Bedroom built-ins
It took several months of a Saturday here and there, but we finally finished our most recent project: built-in bedroom cabinets.
We were kind of bored with our bedroom. It was pretty plain, with original builder-grade Agreeable Grey paint.
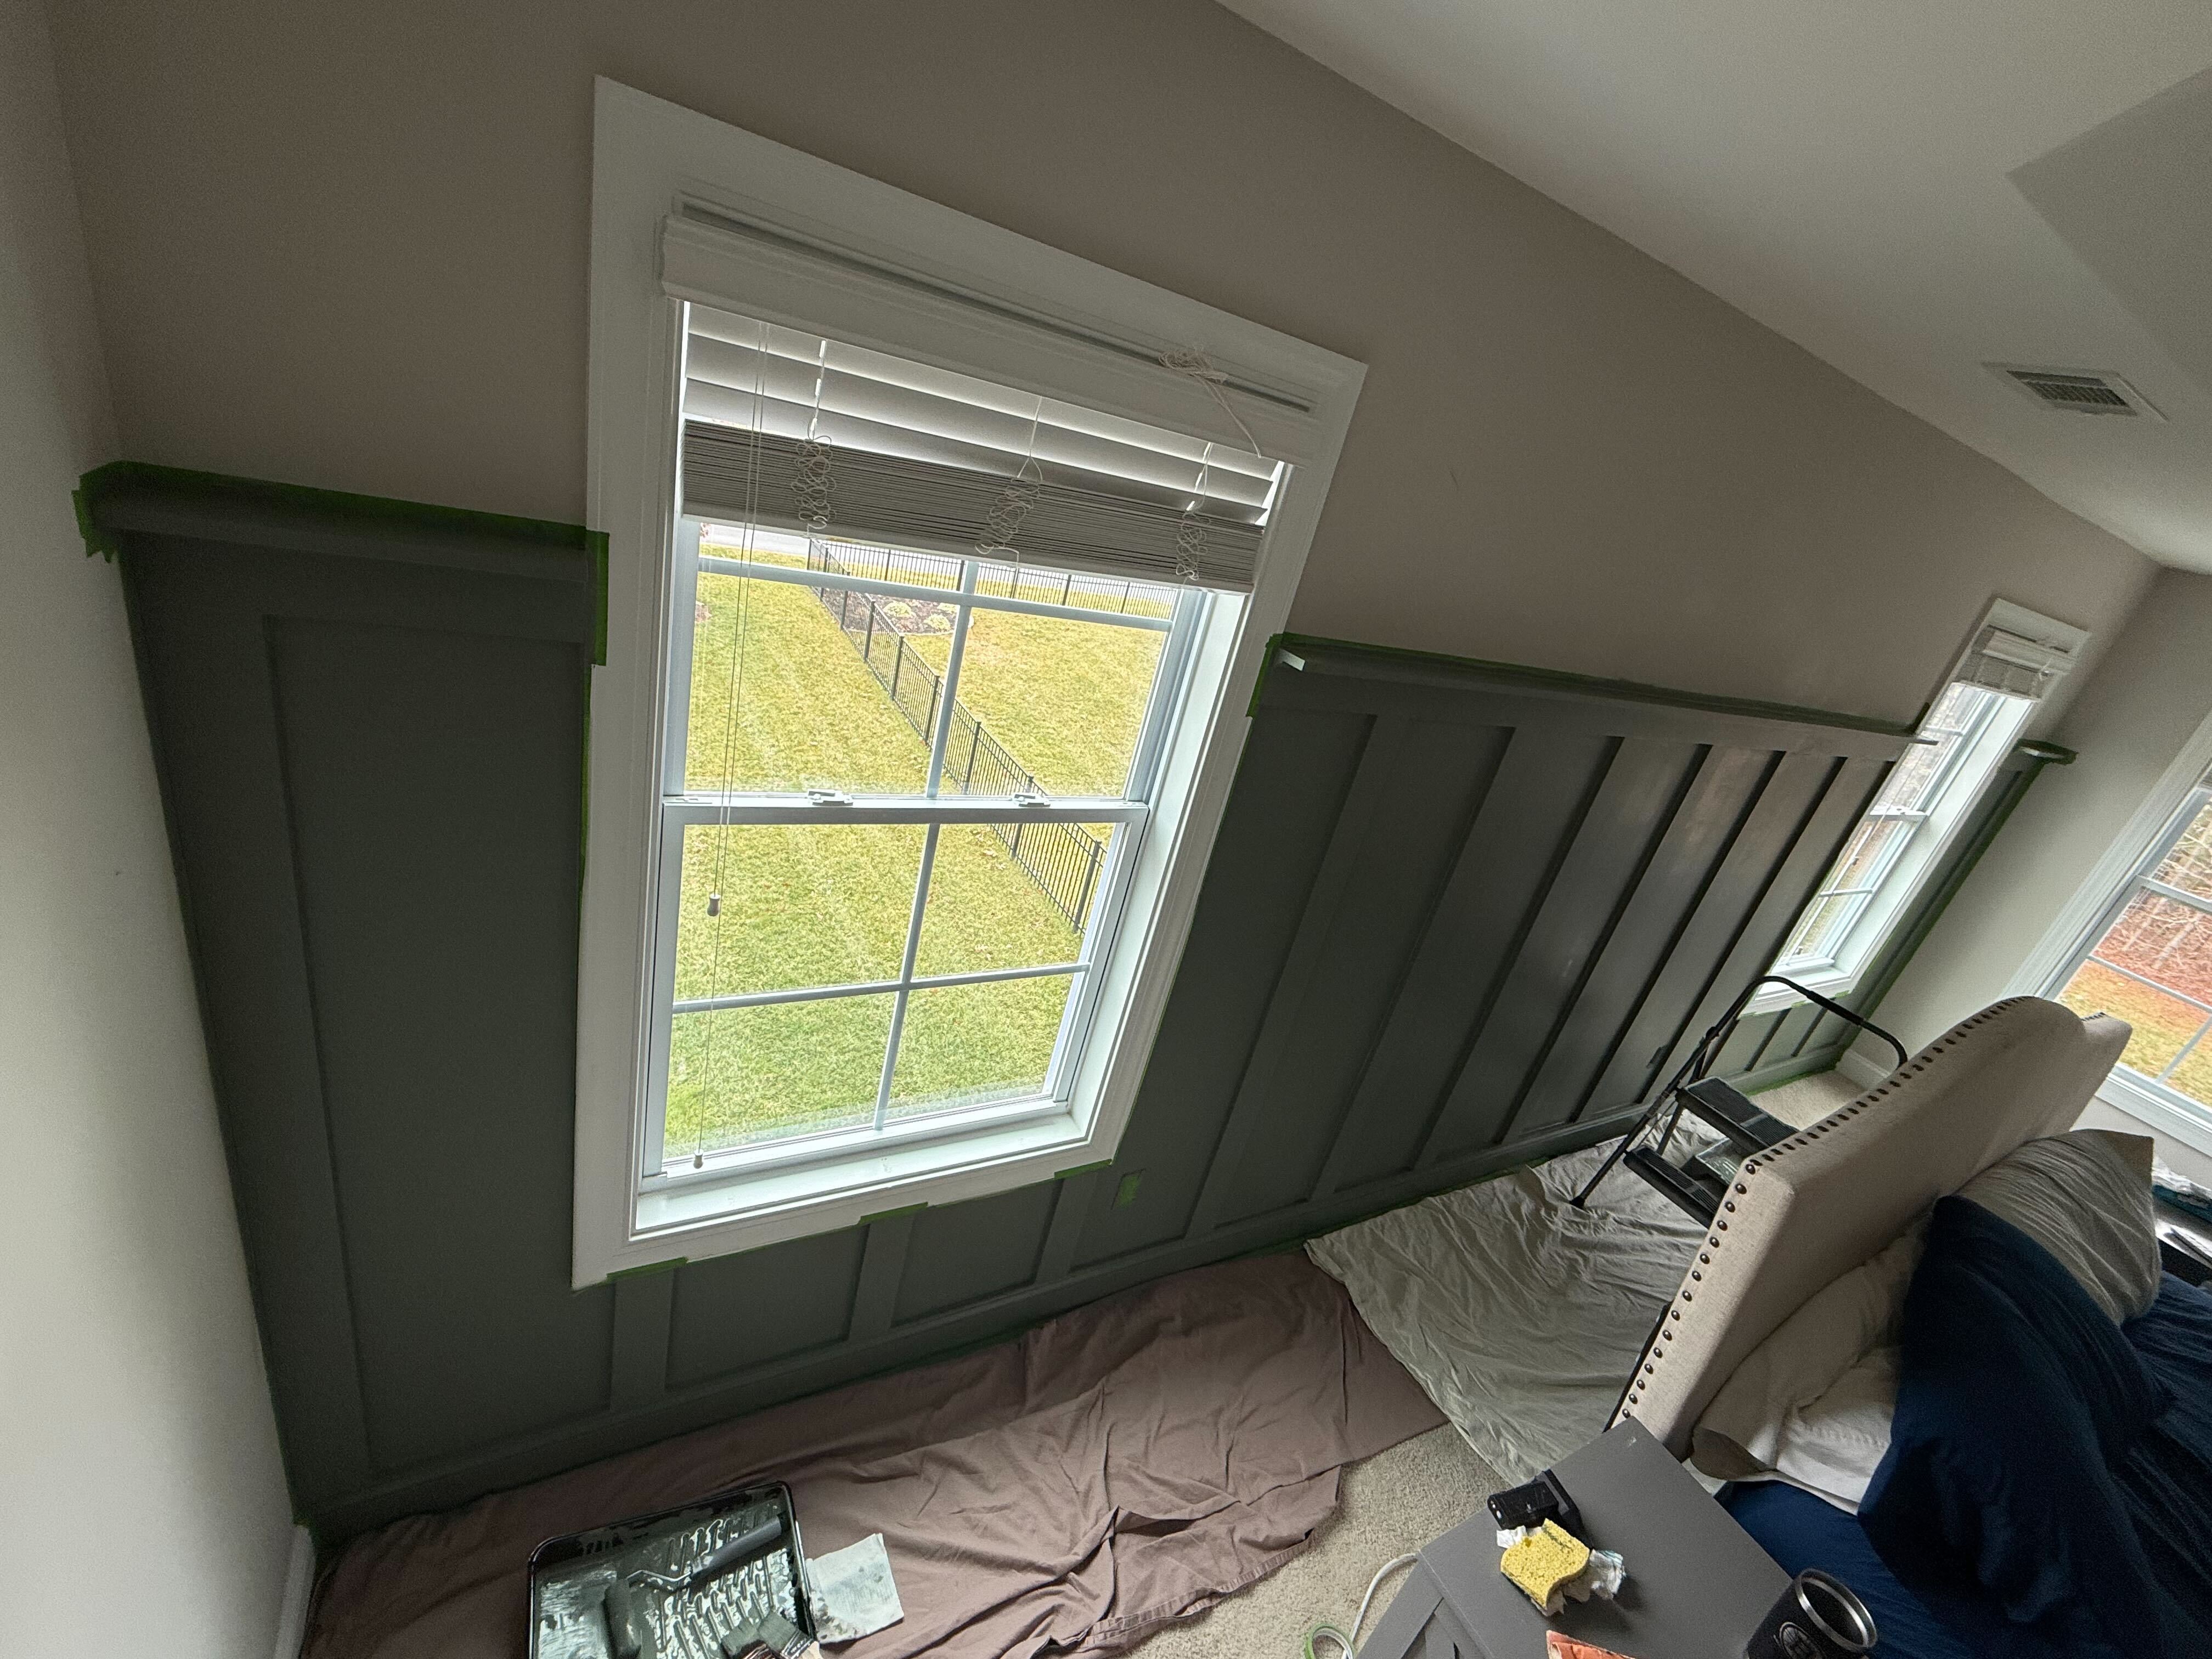
Seeing lots of DIY reels made us want to put board & batten behind the bed. So we did. 1x4s everywhere, with a 1×6 shelf:
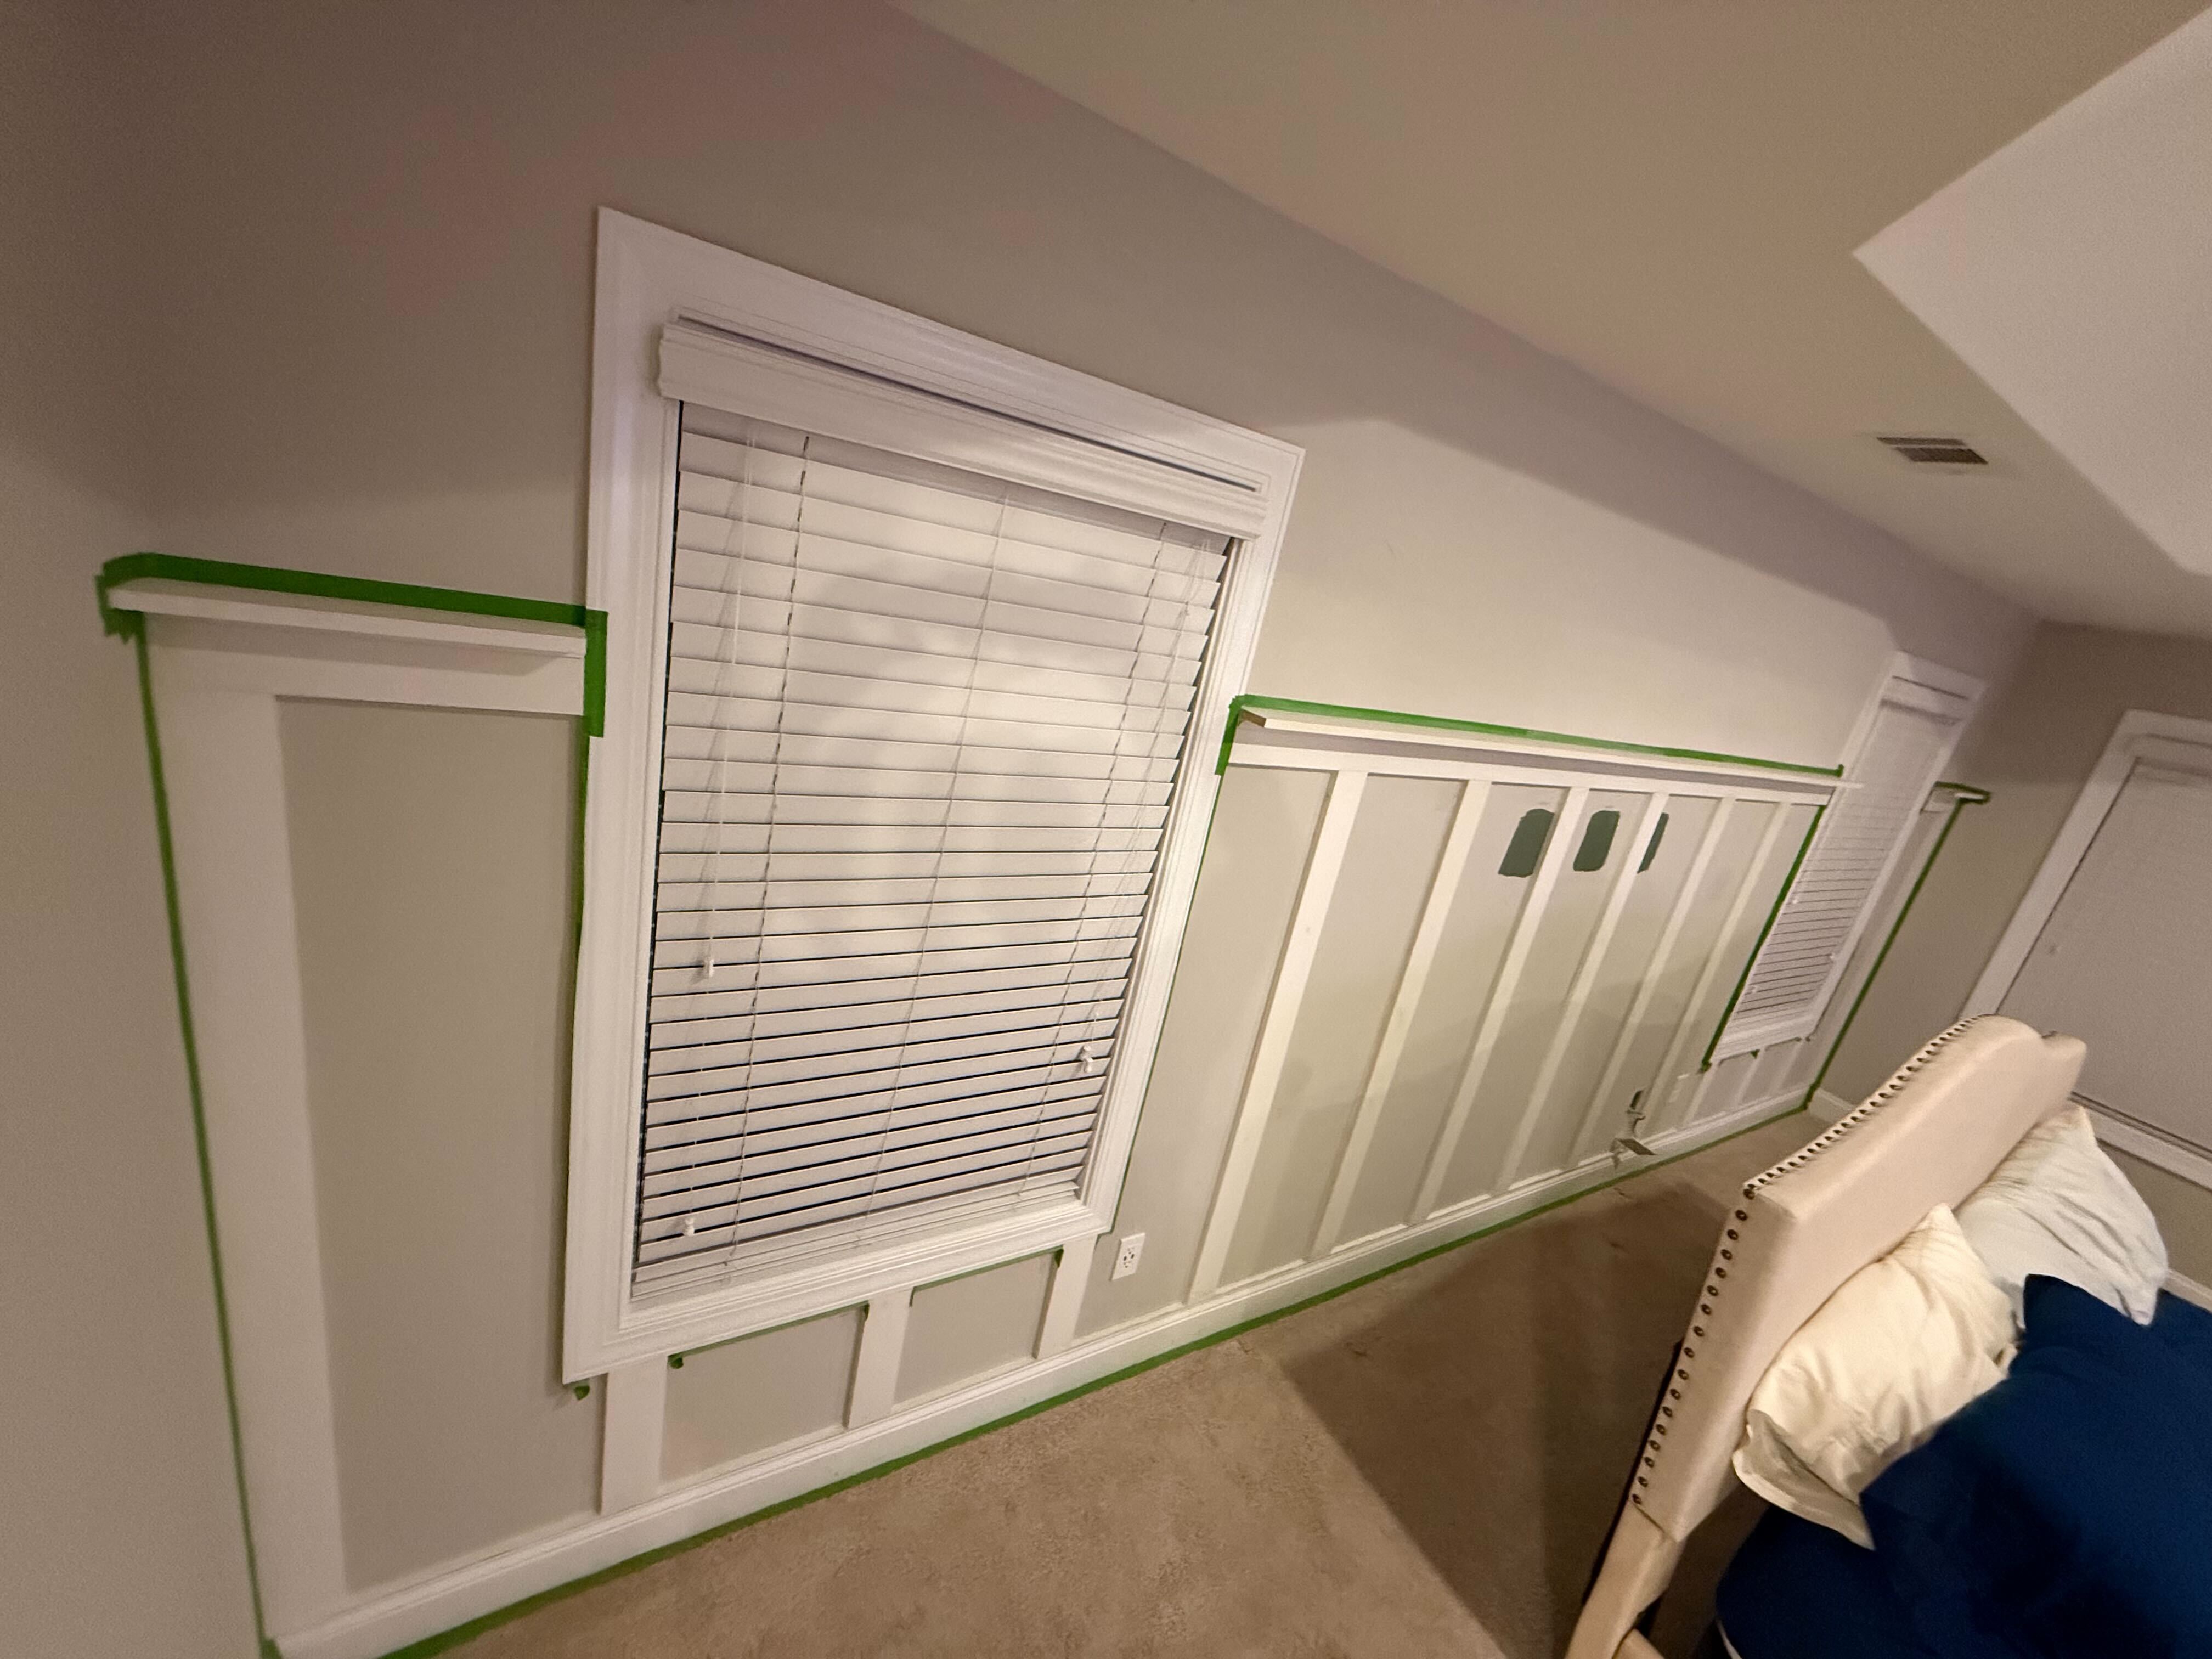
Then we chose a very different color than what we were used to. We went with Sherman-Williams Dried Thyme – but we took the formula to Benjamin Moore, because I like their paint a lot better (we used Aura eggshell). We used primed MDF for all the parts on this wall, not just because it’s cheaper than wood, but also it’s less prone to warping, and I was worried about that shelf over time.
Once that wall was done, it was time to turn to the opposite wall. Which, previously, just had a TV and a dresser.
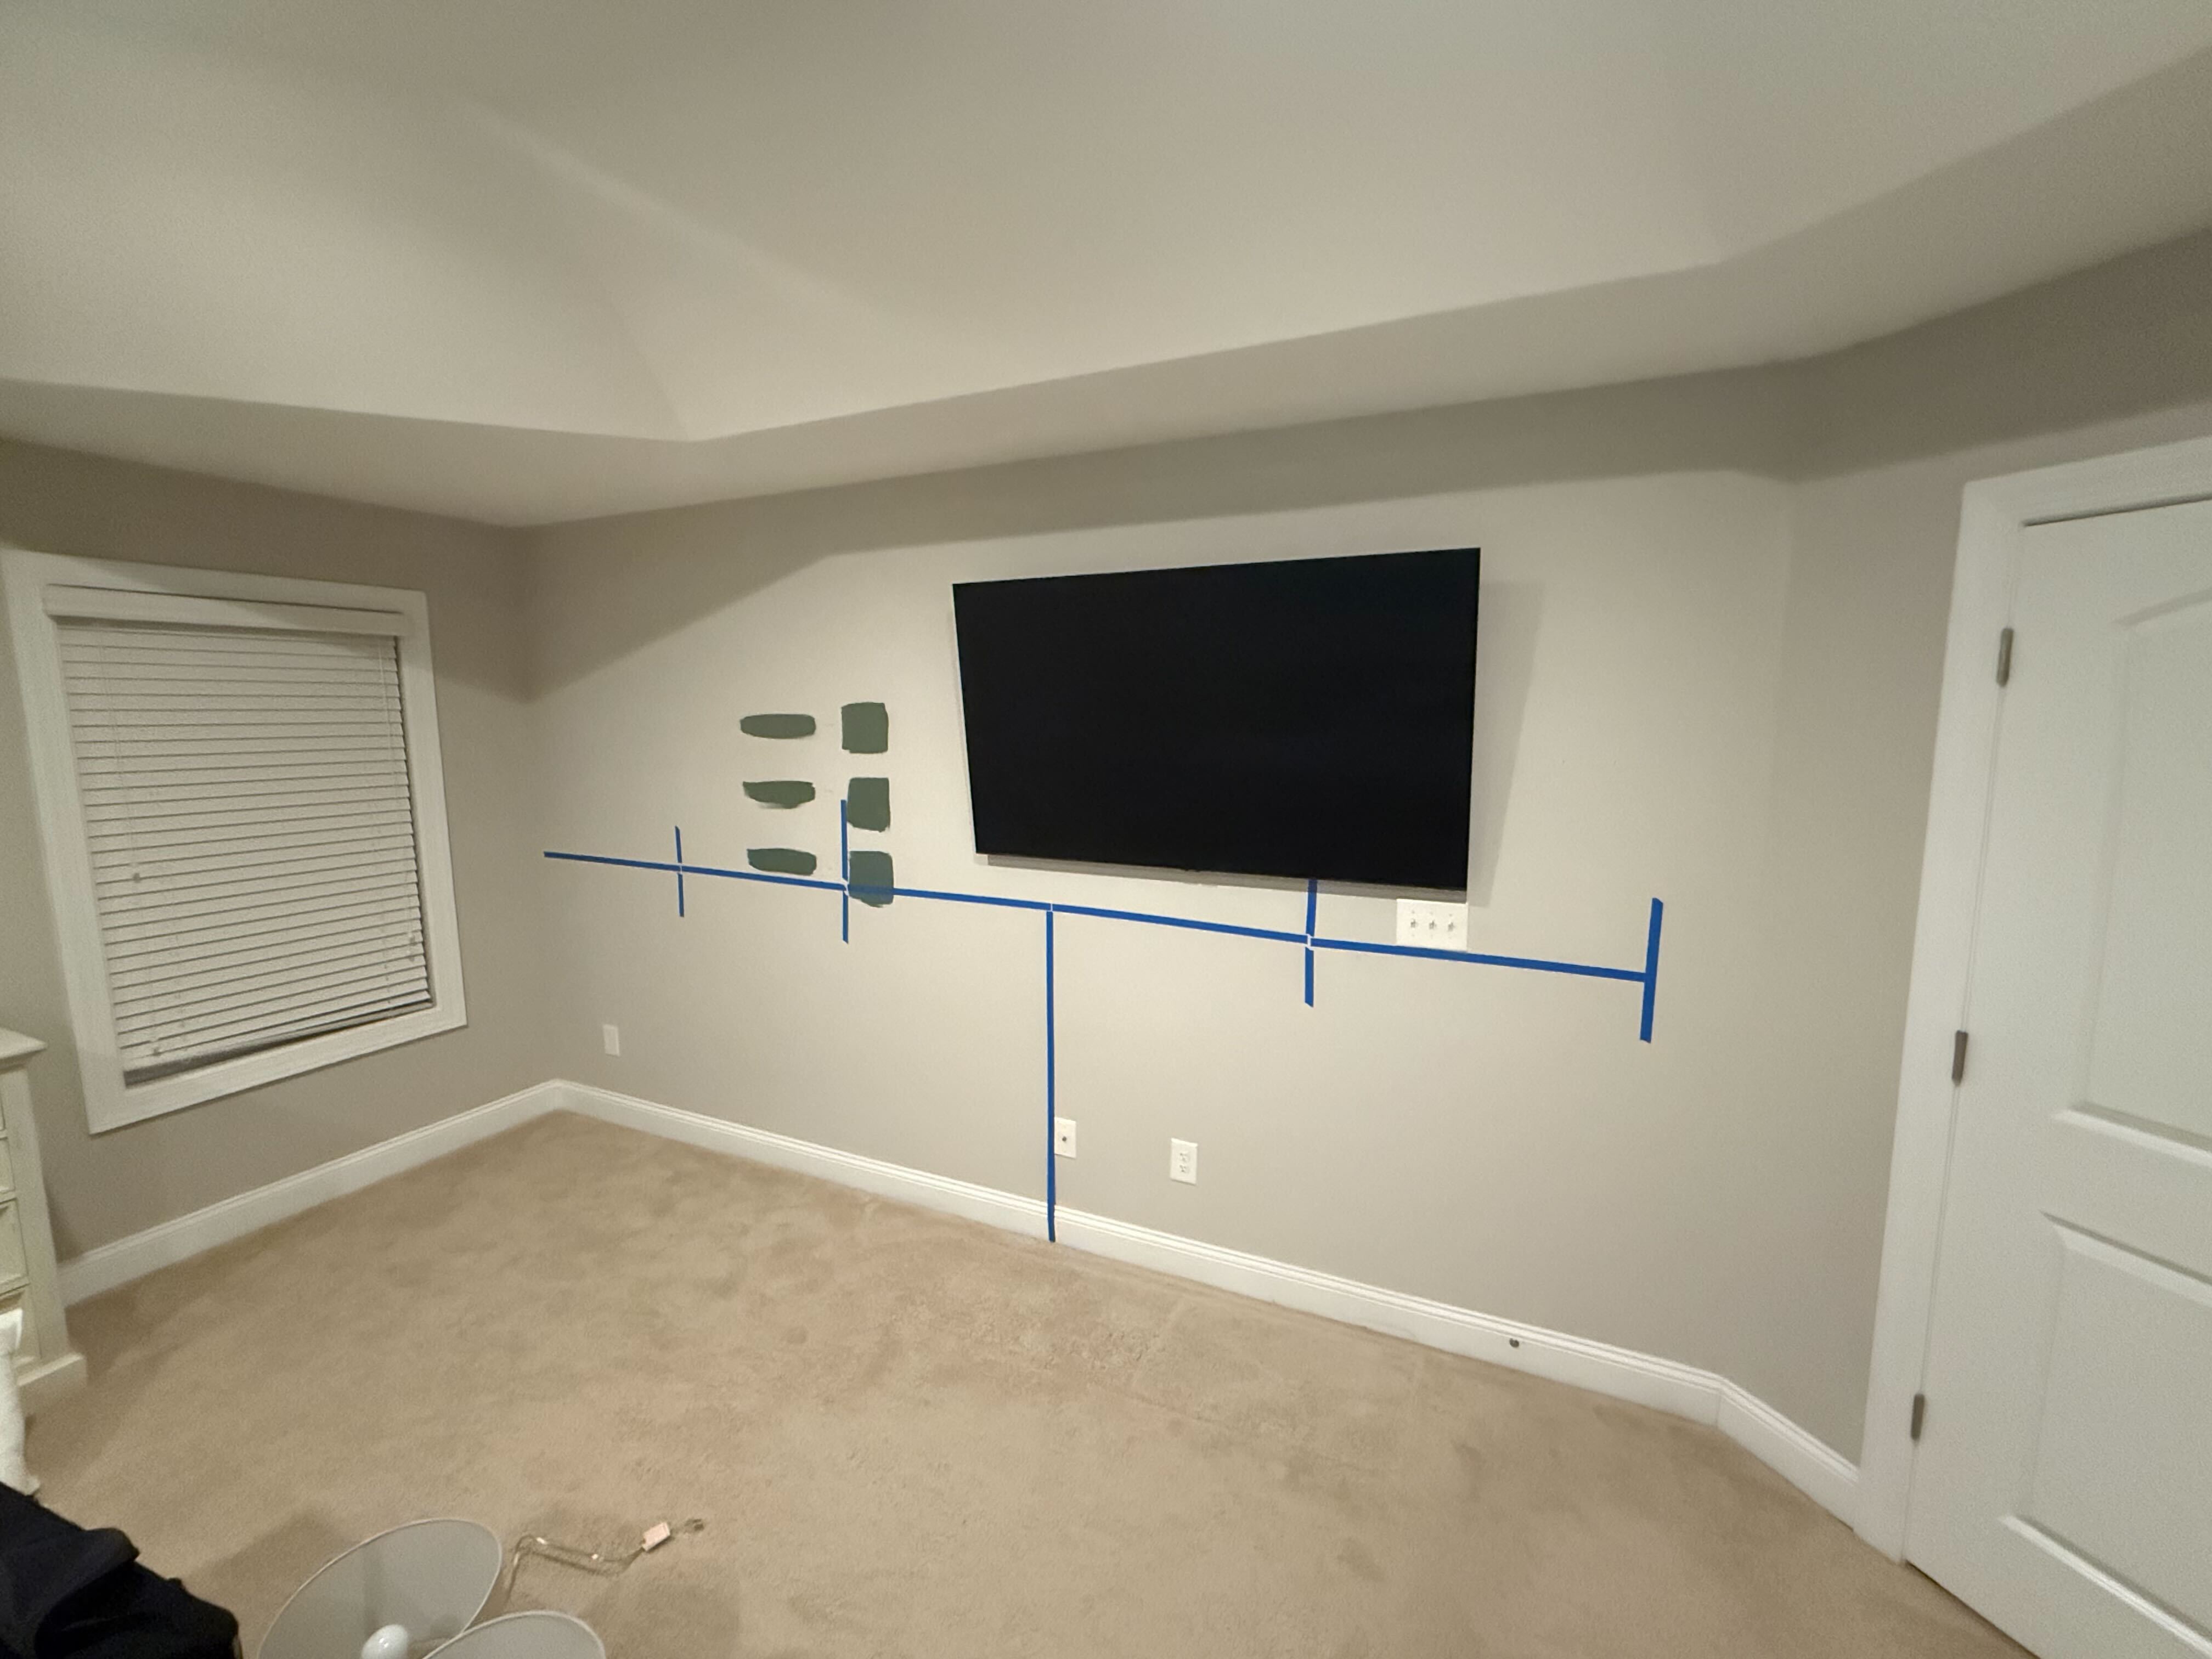
BOOOOOOORRRING.
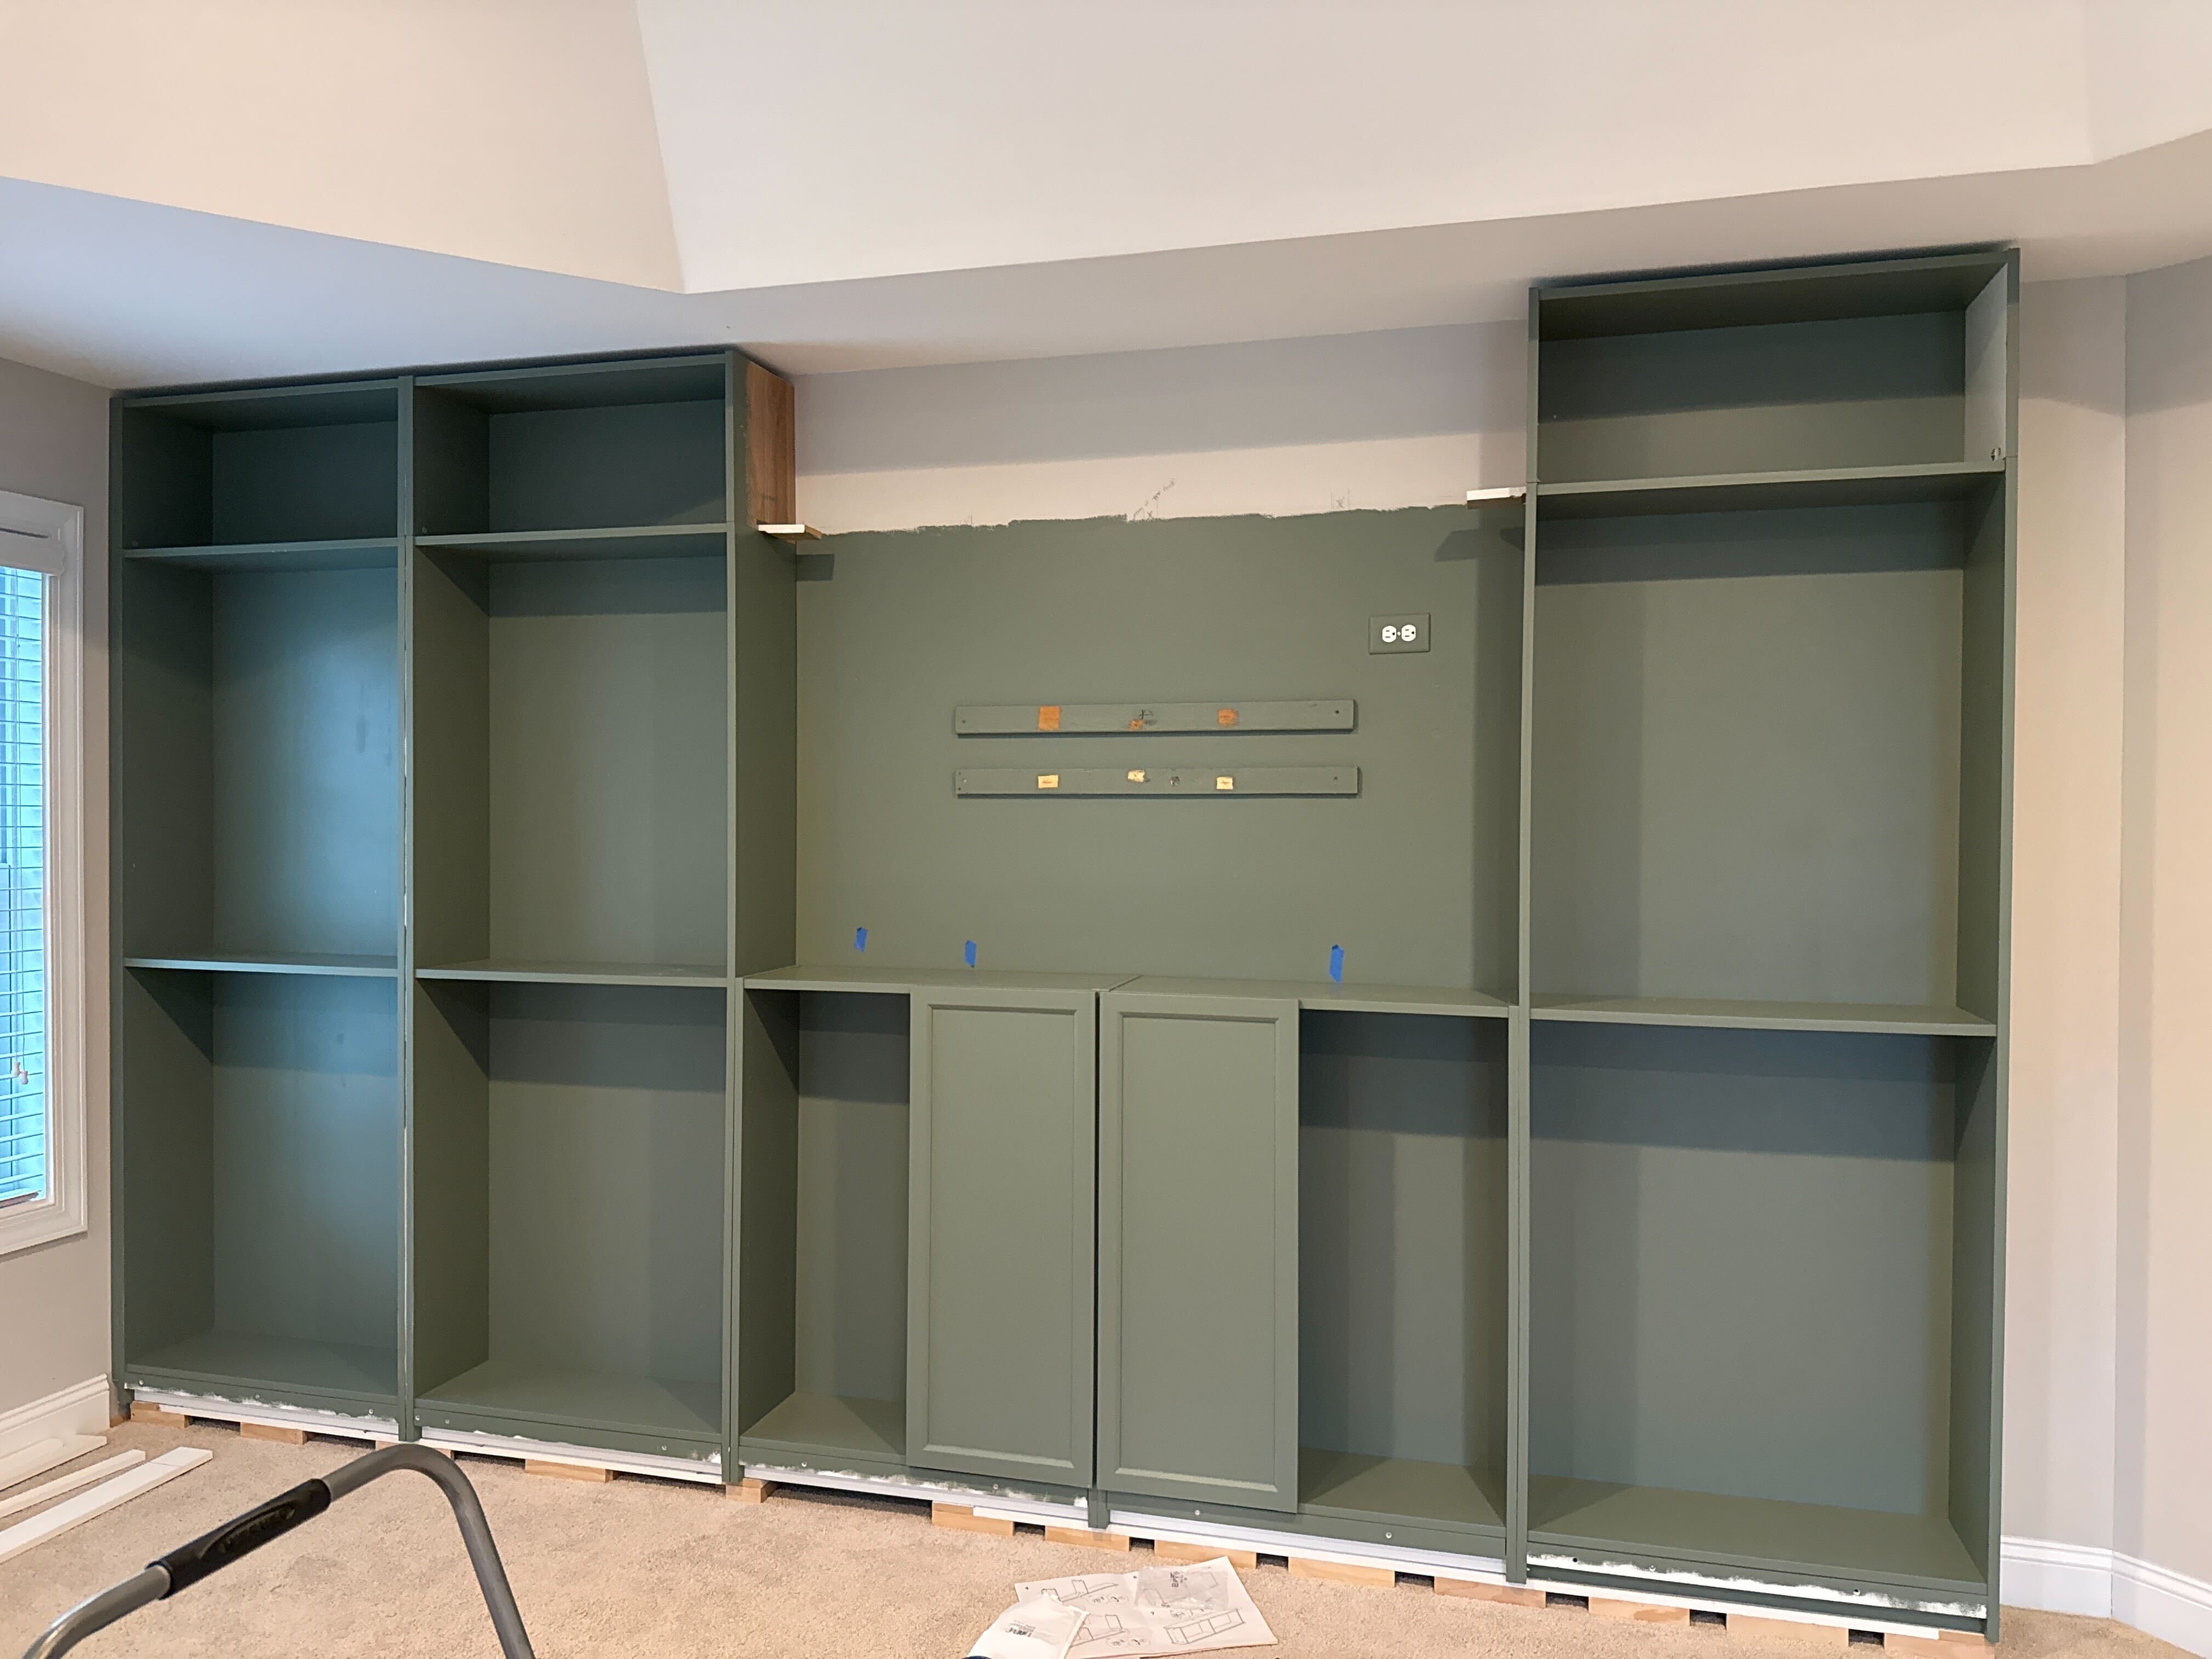
Let’s spice it up. You can see I taped up roughly where I was envisioning the new gear. The lower half of the wall would be cabinets with doors; the upper half would be open shelves (and yes, still a spot for the TV).
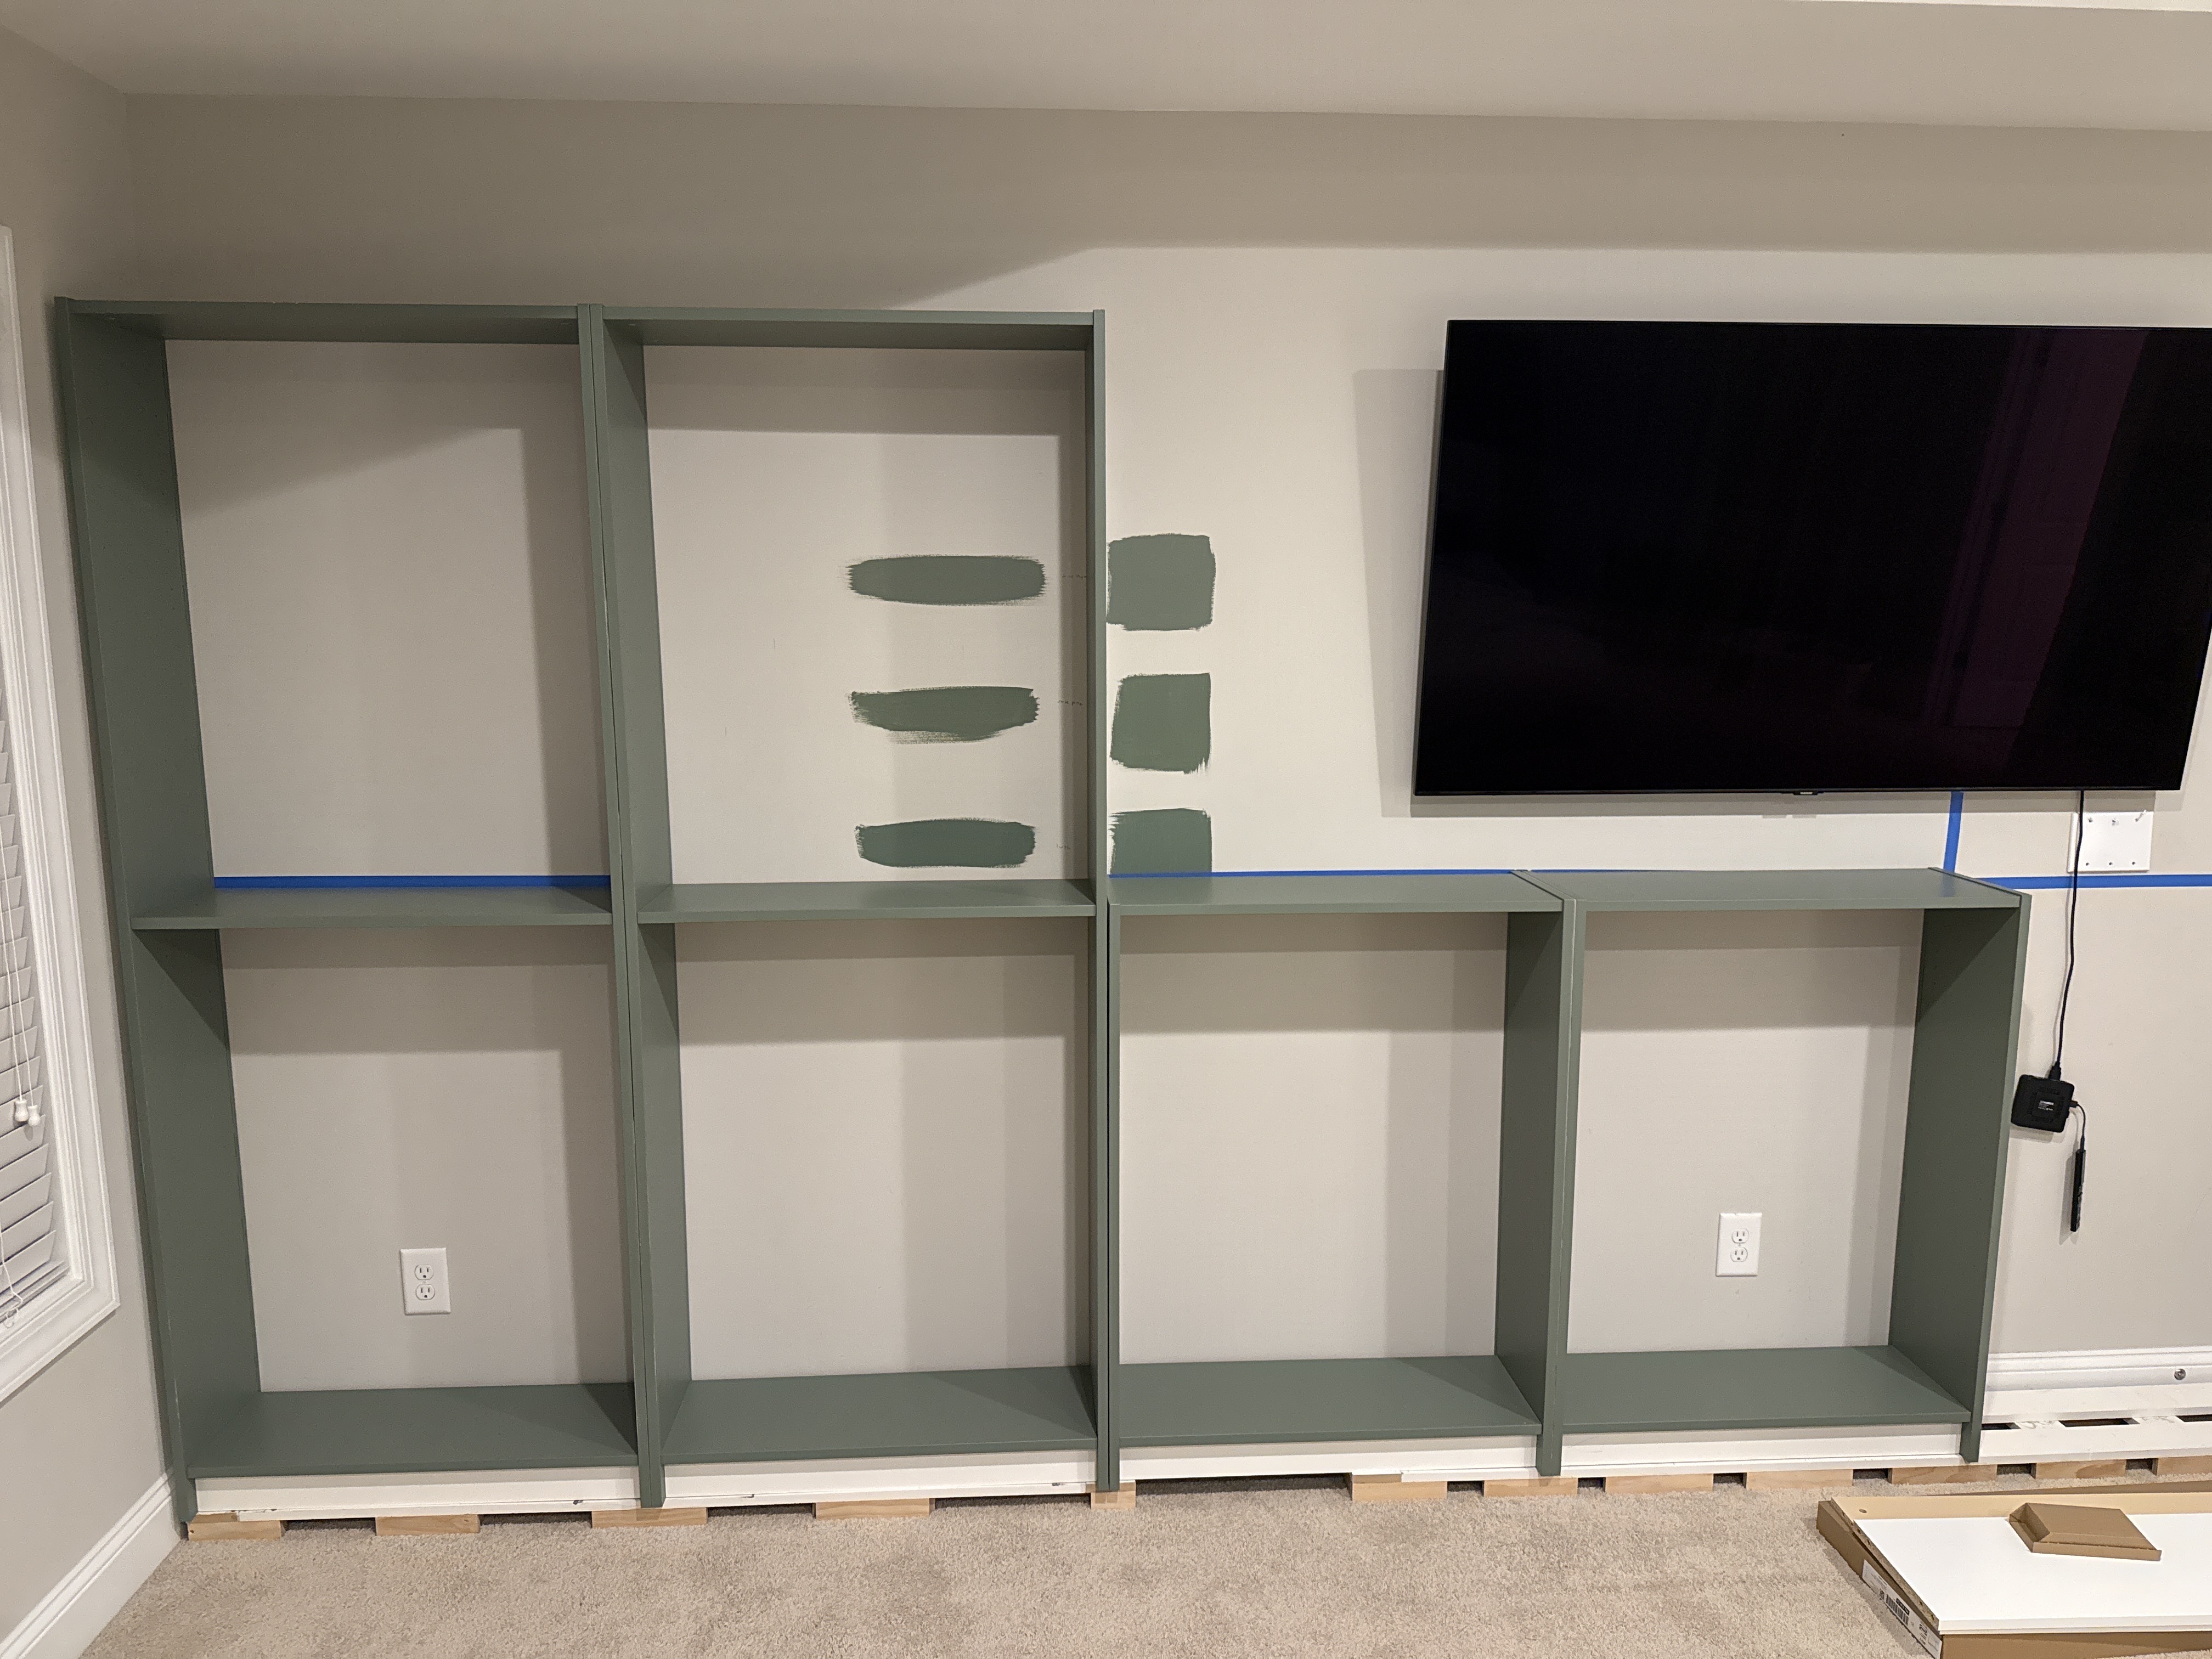
We could only handle cabinets that are 11″ deep on this wall because of that pesky window. We debated using kitchen uppers for the lower cabinets but, in the end, we went with Ikea (for simplicity, we thought). We used an odd number of cabinets – even though the TV would take up two of them – because the shape of the room and the ceiling made it very difficult to actually have something truly centered, at least using cabinets we didn’t have to build from scratch. I have about 20 sheets of grid paper with mock layouts that prove how hard I tried to make something work.
Alas, here is what we set out with:
- 3 x Billy 79″
- 2 x Billy 42″
- 5 x Billy height extenders
- 10 x Oxberg doors
We primed all the pieces. So. Many. Pieces. If you’ve tried to paint Ikea furniture, you know; they don’t make it easy. It’s such a glossy surface, and nothing sticks to it – not even paint marketed as “paint and primer.” We applied two coats of Zinsser Bin Advanced and then two coats of the Dried Thyme. The garage was a rotating assembly line for what seemed like ages.
While the paint dried, I built some framing (wood, not MDF!). Another thing we debated quite a bit was whether to cut the carpet and mount to the subfloor or just rest on top of the carpet. Since I didn’t really envision how we would then keep the carpet in place – and since the carpet is not very thick anyway – we went with the latter. I built the framing just high enough to face it with a 1×6 that would match the height of the baseboards. And I would cut a 1-inch slit in the baseboard to blend that footer into the wall.
Here are a few of the basic shells sat up on the framing to take final measurements and to place the framing precisely:
(And yes, you can put Oxberg doors back-to-back on two Billy units that are smooshed together as closely as possible. It was another reason I wanted to test this stuff out before later phases, and they don’t interfere with each other at all.)
I would have to move the TV slightly, so I went with a new and more flexible mount. I put up 1x2s (again, wood, not MDF!) to attach the mount to, because the studs also didn’t align for nice centering:
The new mount would make it very easy to pull the TV out and get behind there when I need to – which is always a chore with fixed mounts. One of the upsides of the size of the Billy is that this TV fits almost perfectly, as you’ll see shortly.
You might notice we made two outlets and a 3-gang wall switch disappear. Probably not to code, but the outlets on the lower wall we’ve just abandoned. The switches were a little more important, but only two of them did anything. We tried out this clever little Thinkbee unit, which was super easy to install, and it works great. We can mount the remote anywhere we like. We talked about building a proper trap door, but decided against it for the time being. If we ever need to get to the gang (or the outlets), well, they’re only a few slices with a multi-tool away. The backs of the Billy are basically cardboard. Which also needed primer (!).
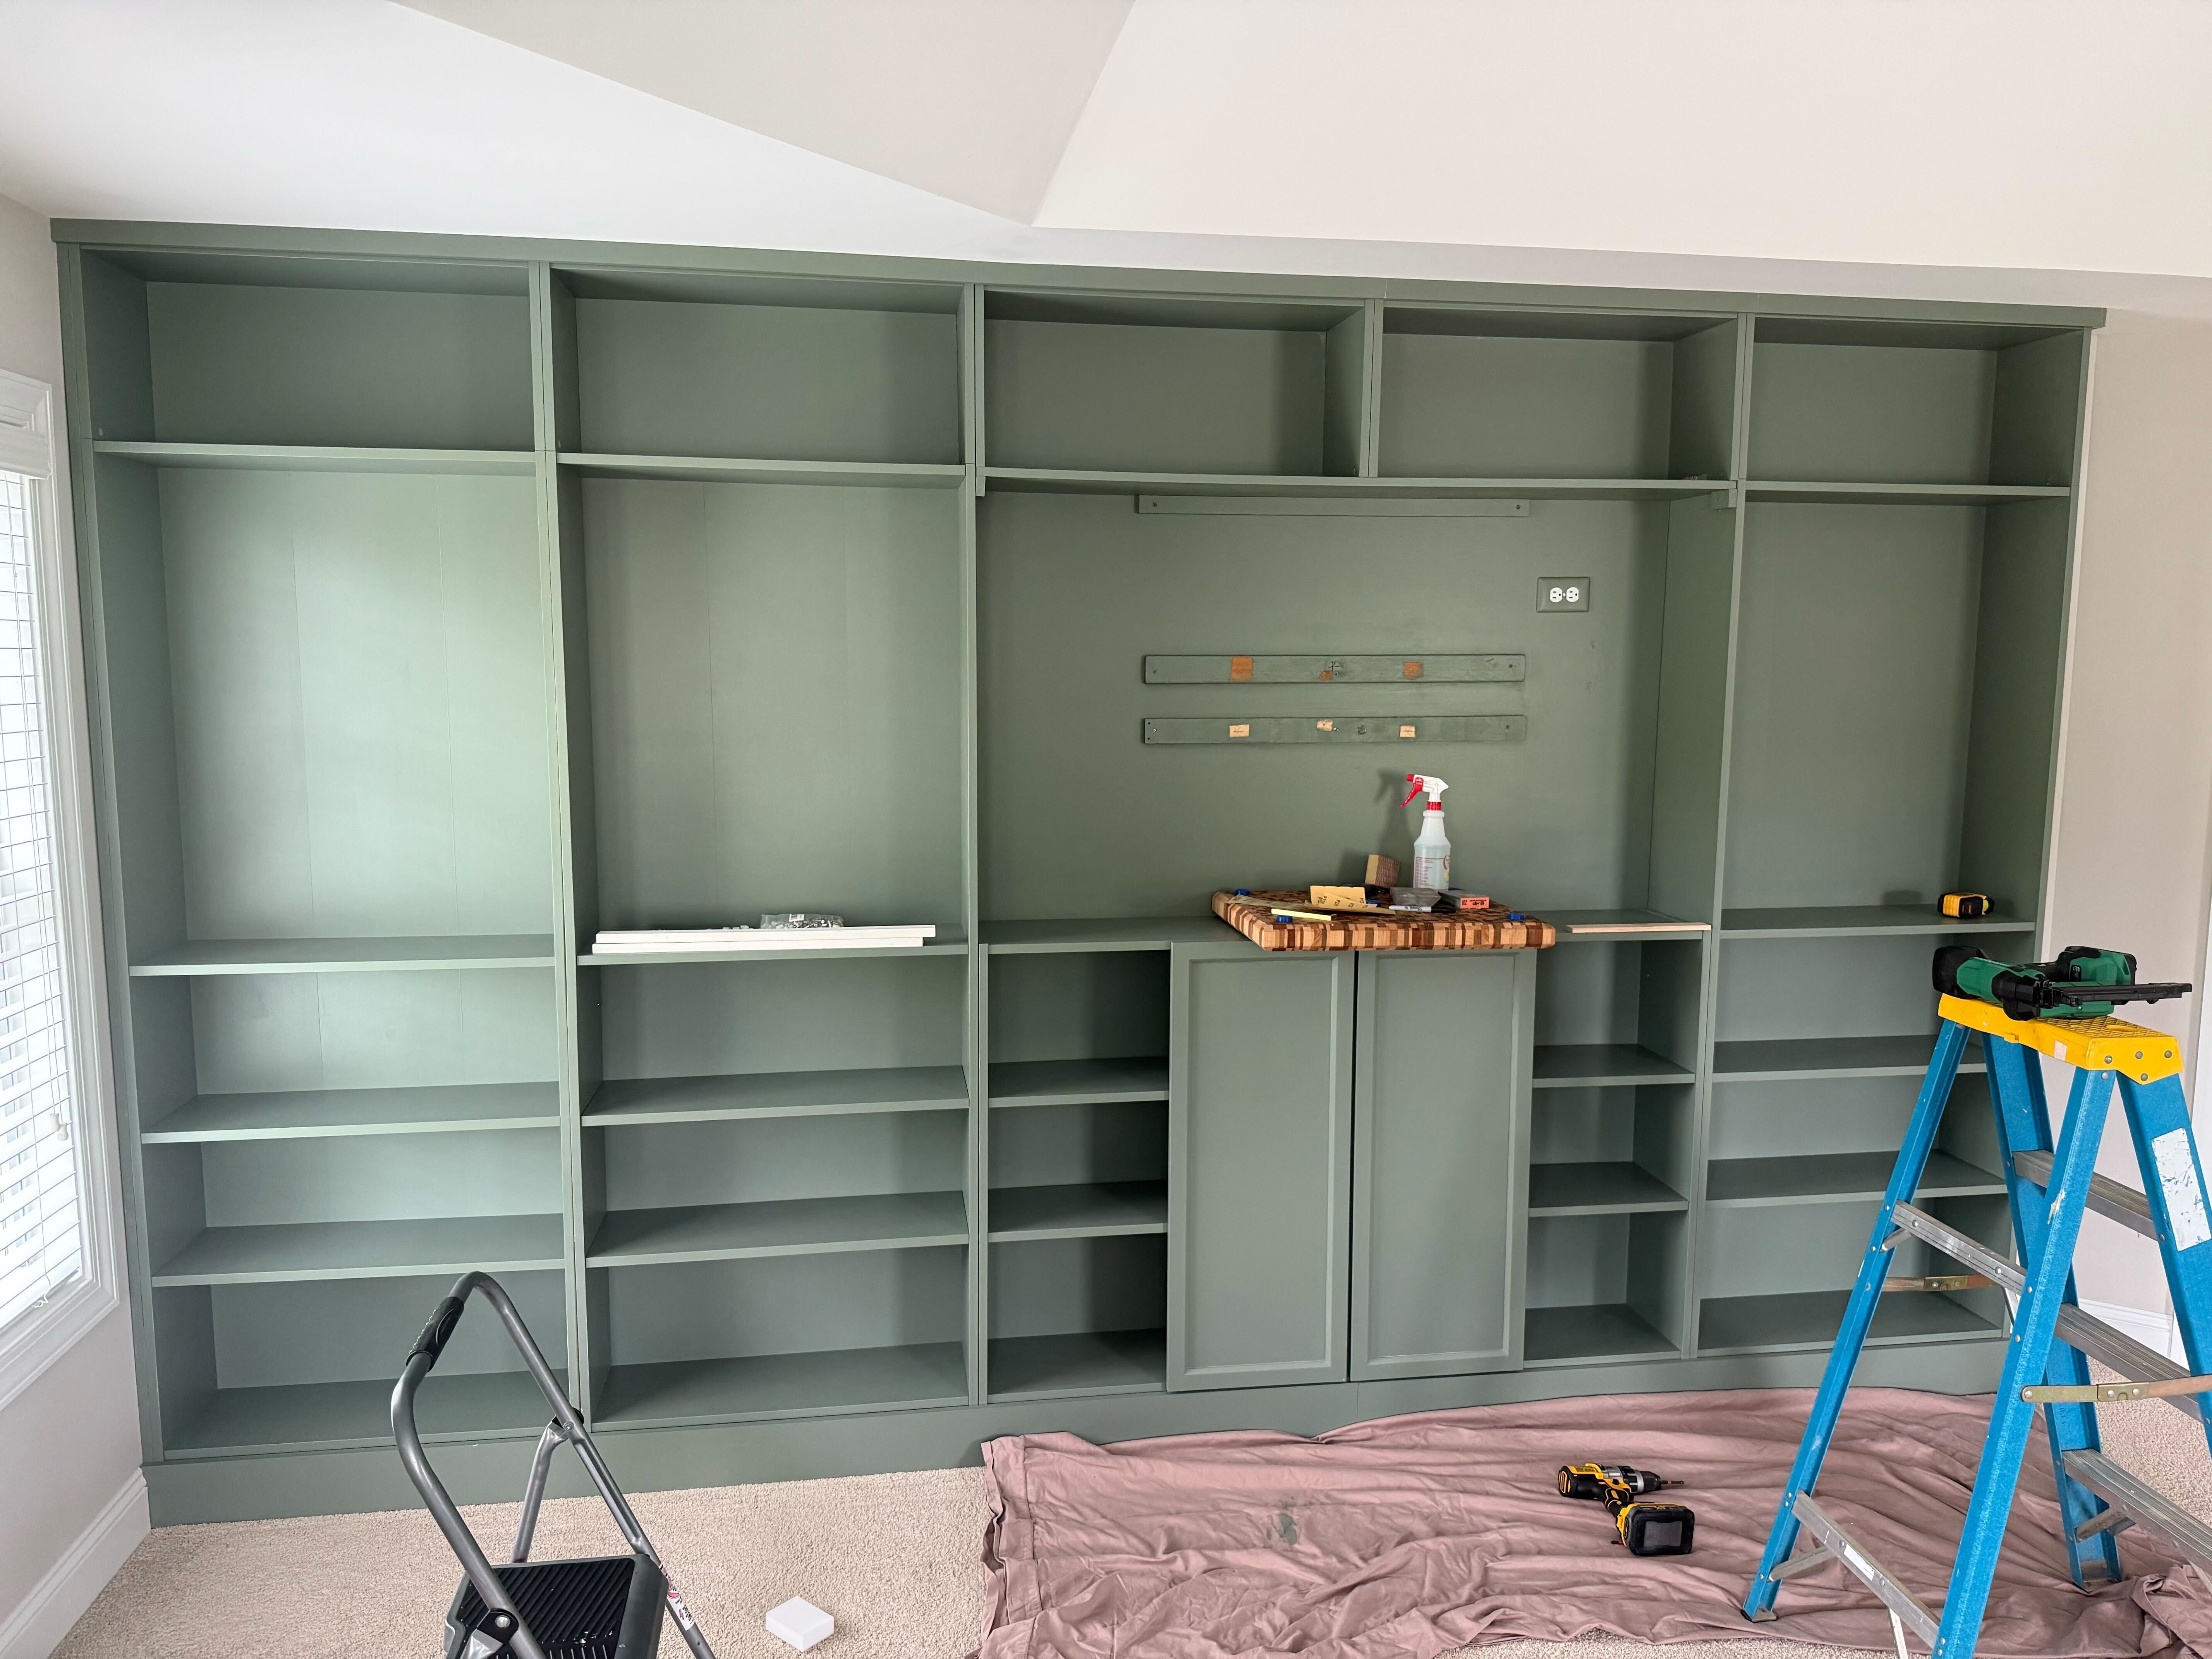
Here’s a little more progress – shelves in the lower half, and the height extenders that I initially had no idea how I was going to mount and stabilize. I just used 1x2s as cleats on the back wall and the sides of the taller bookshelves:
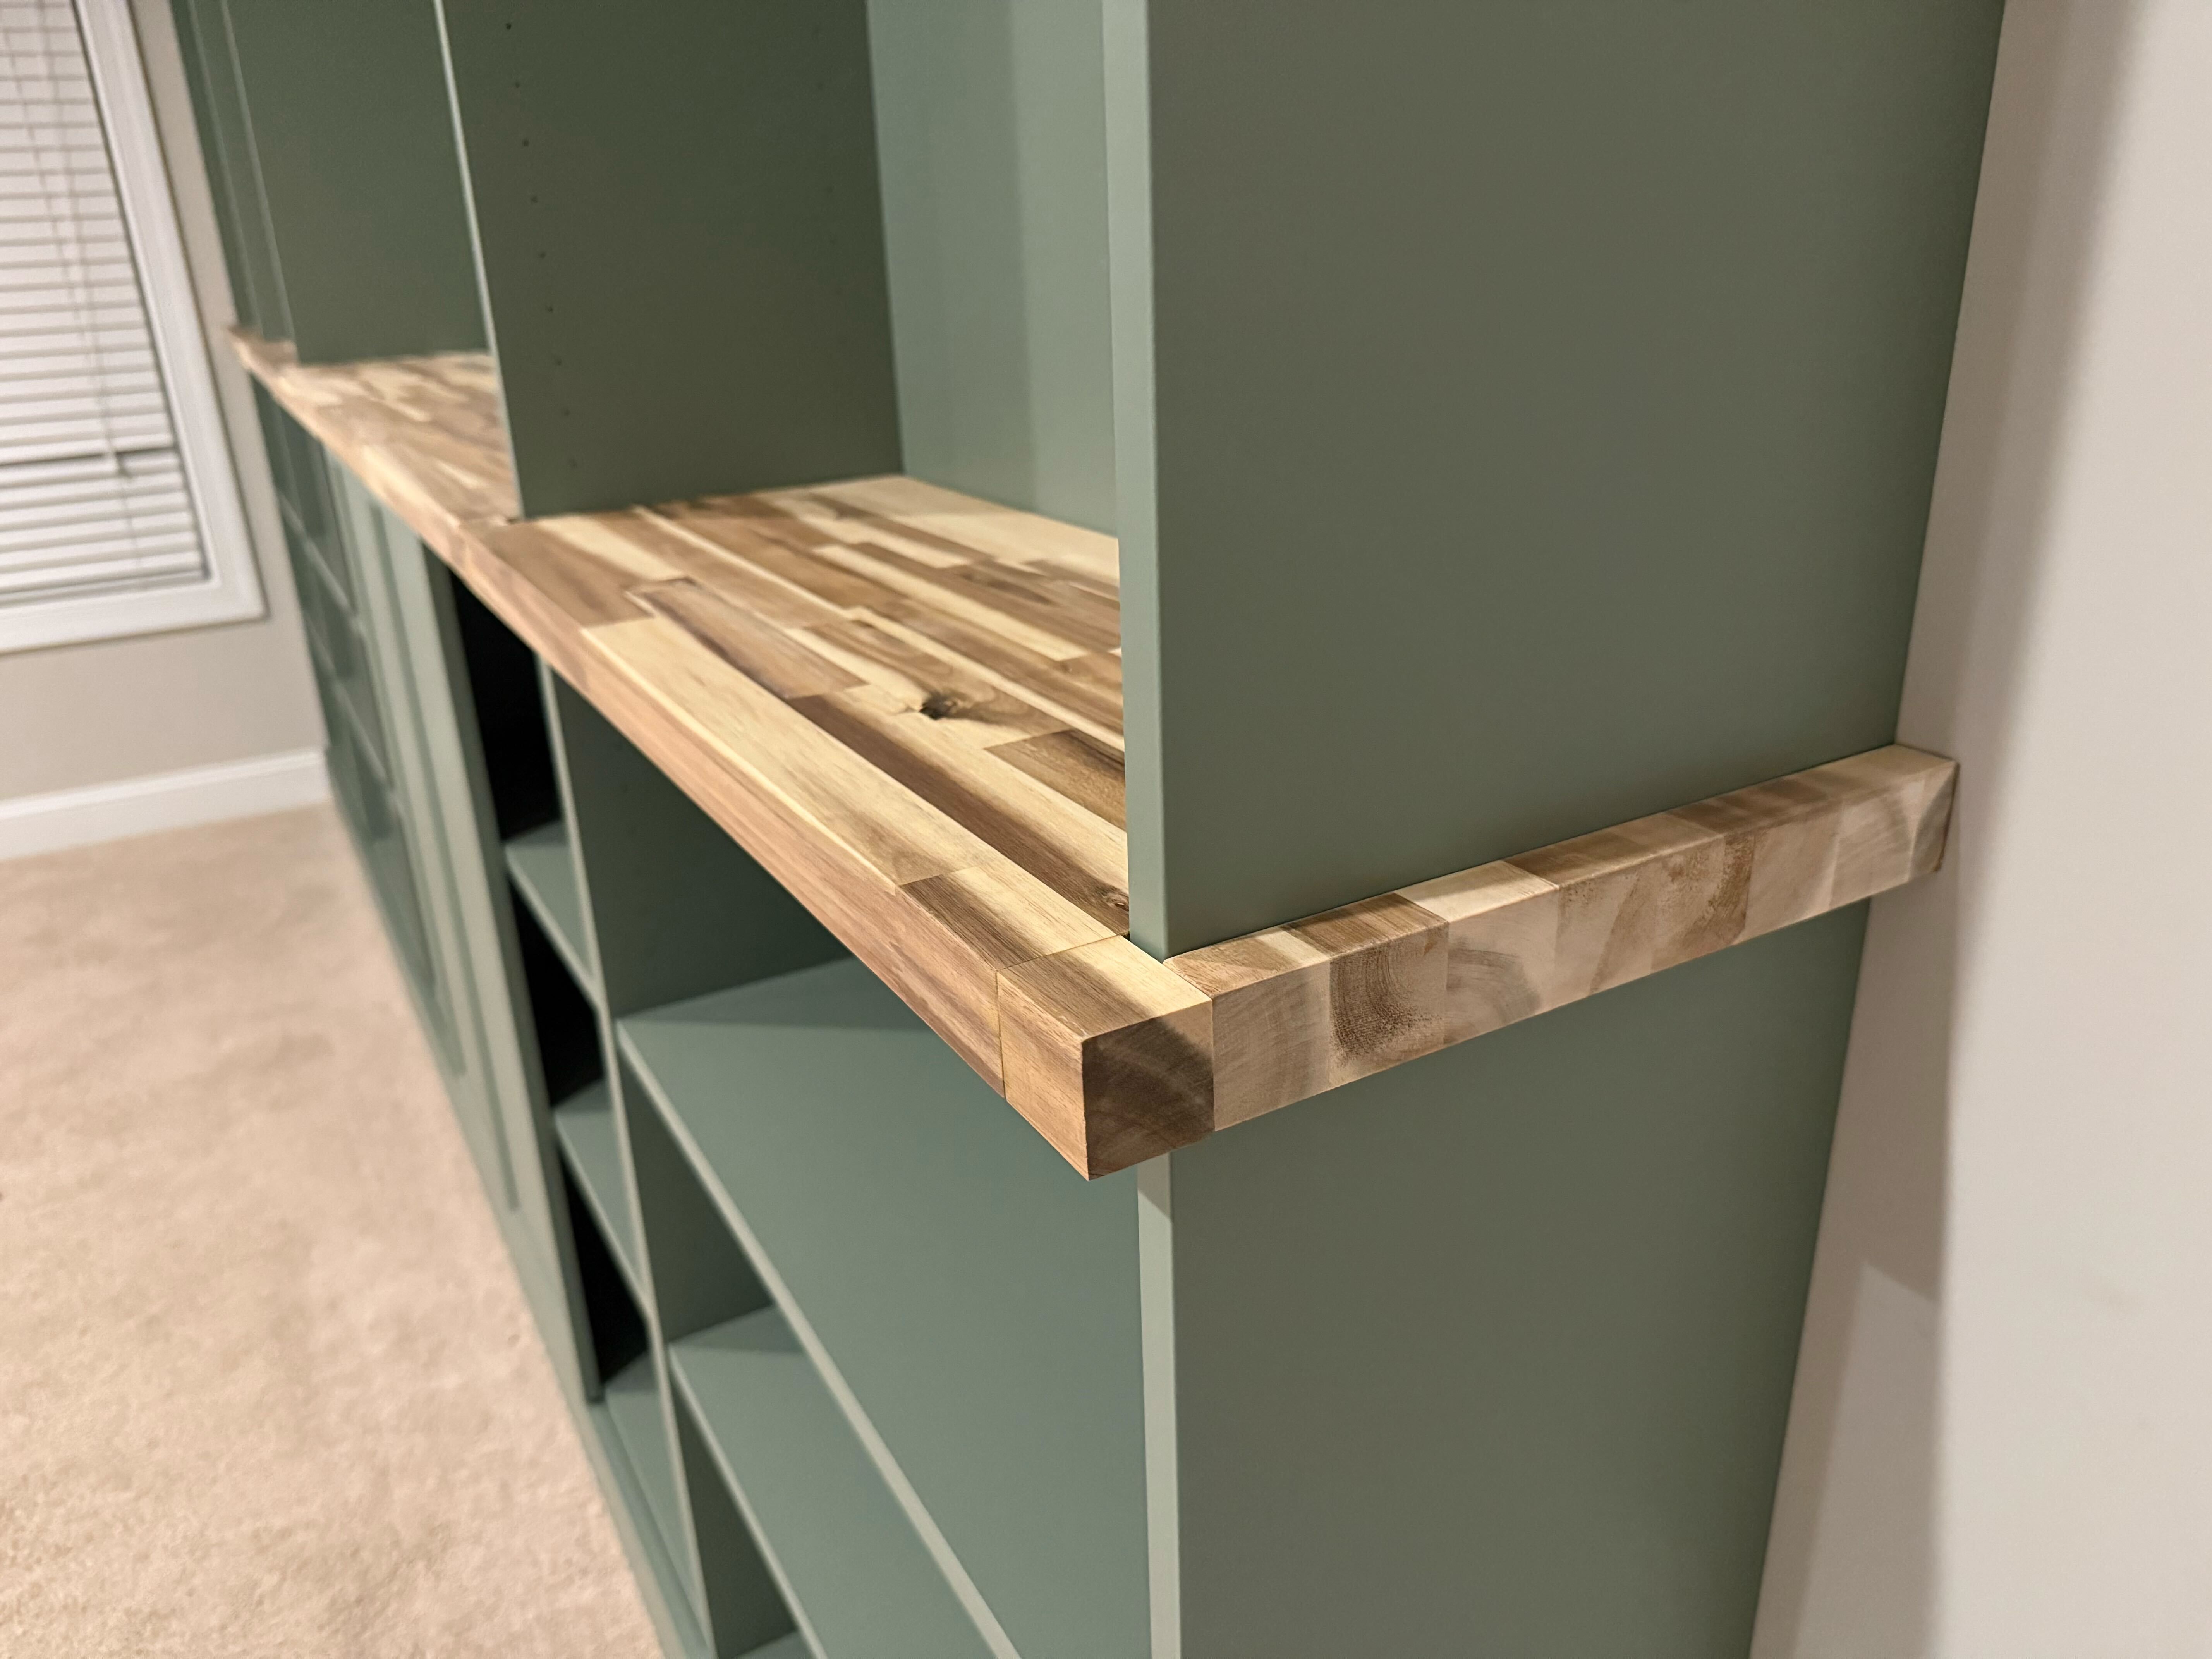
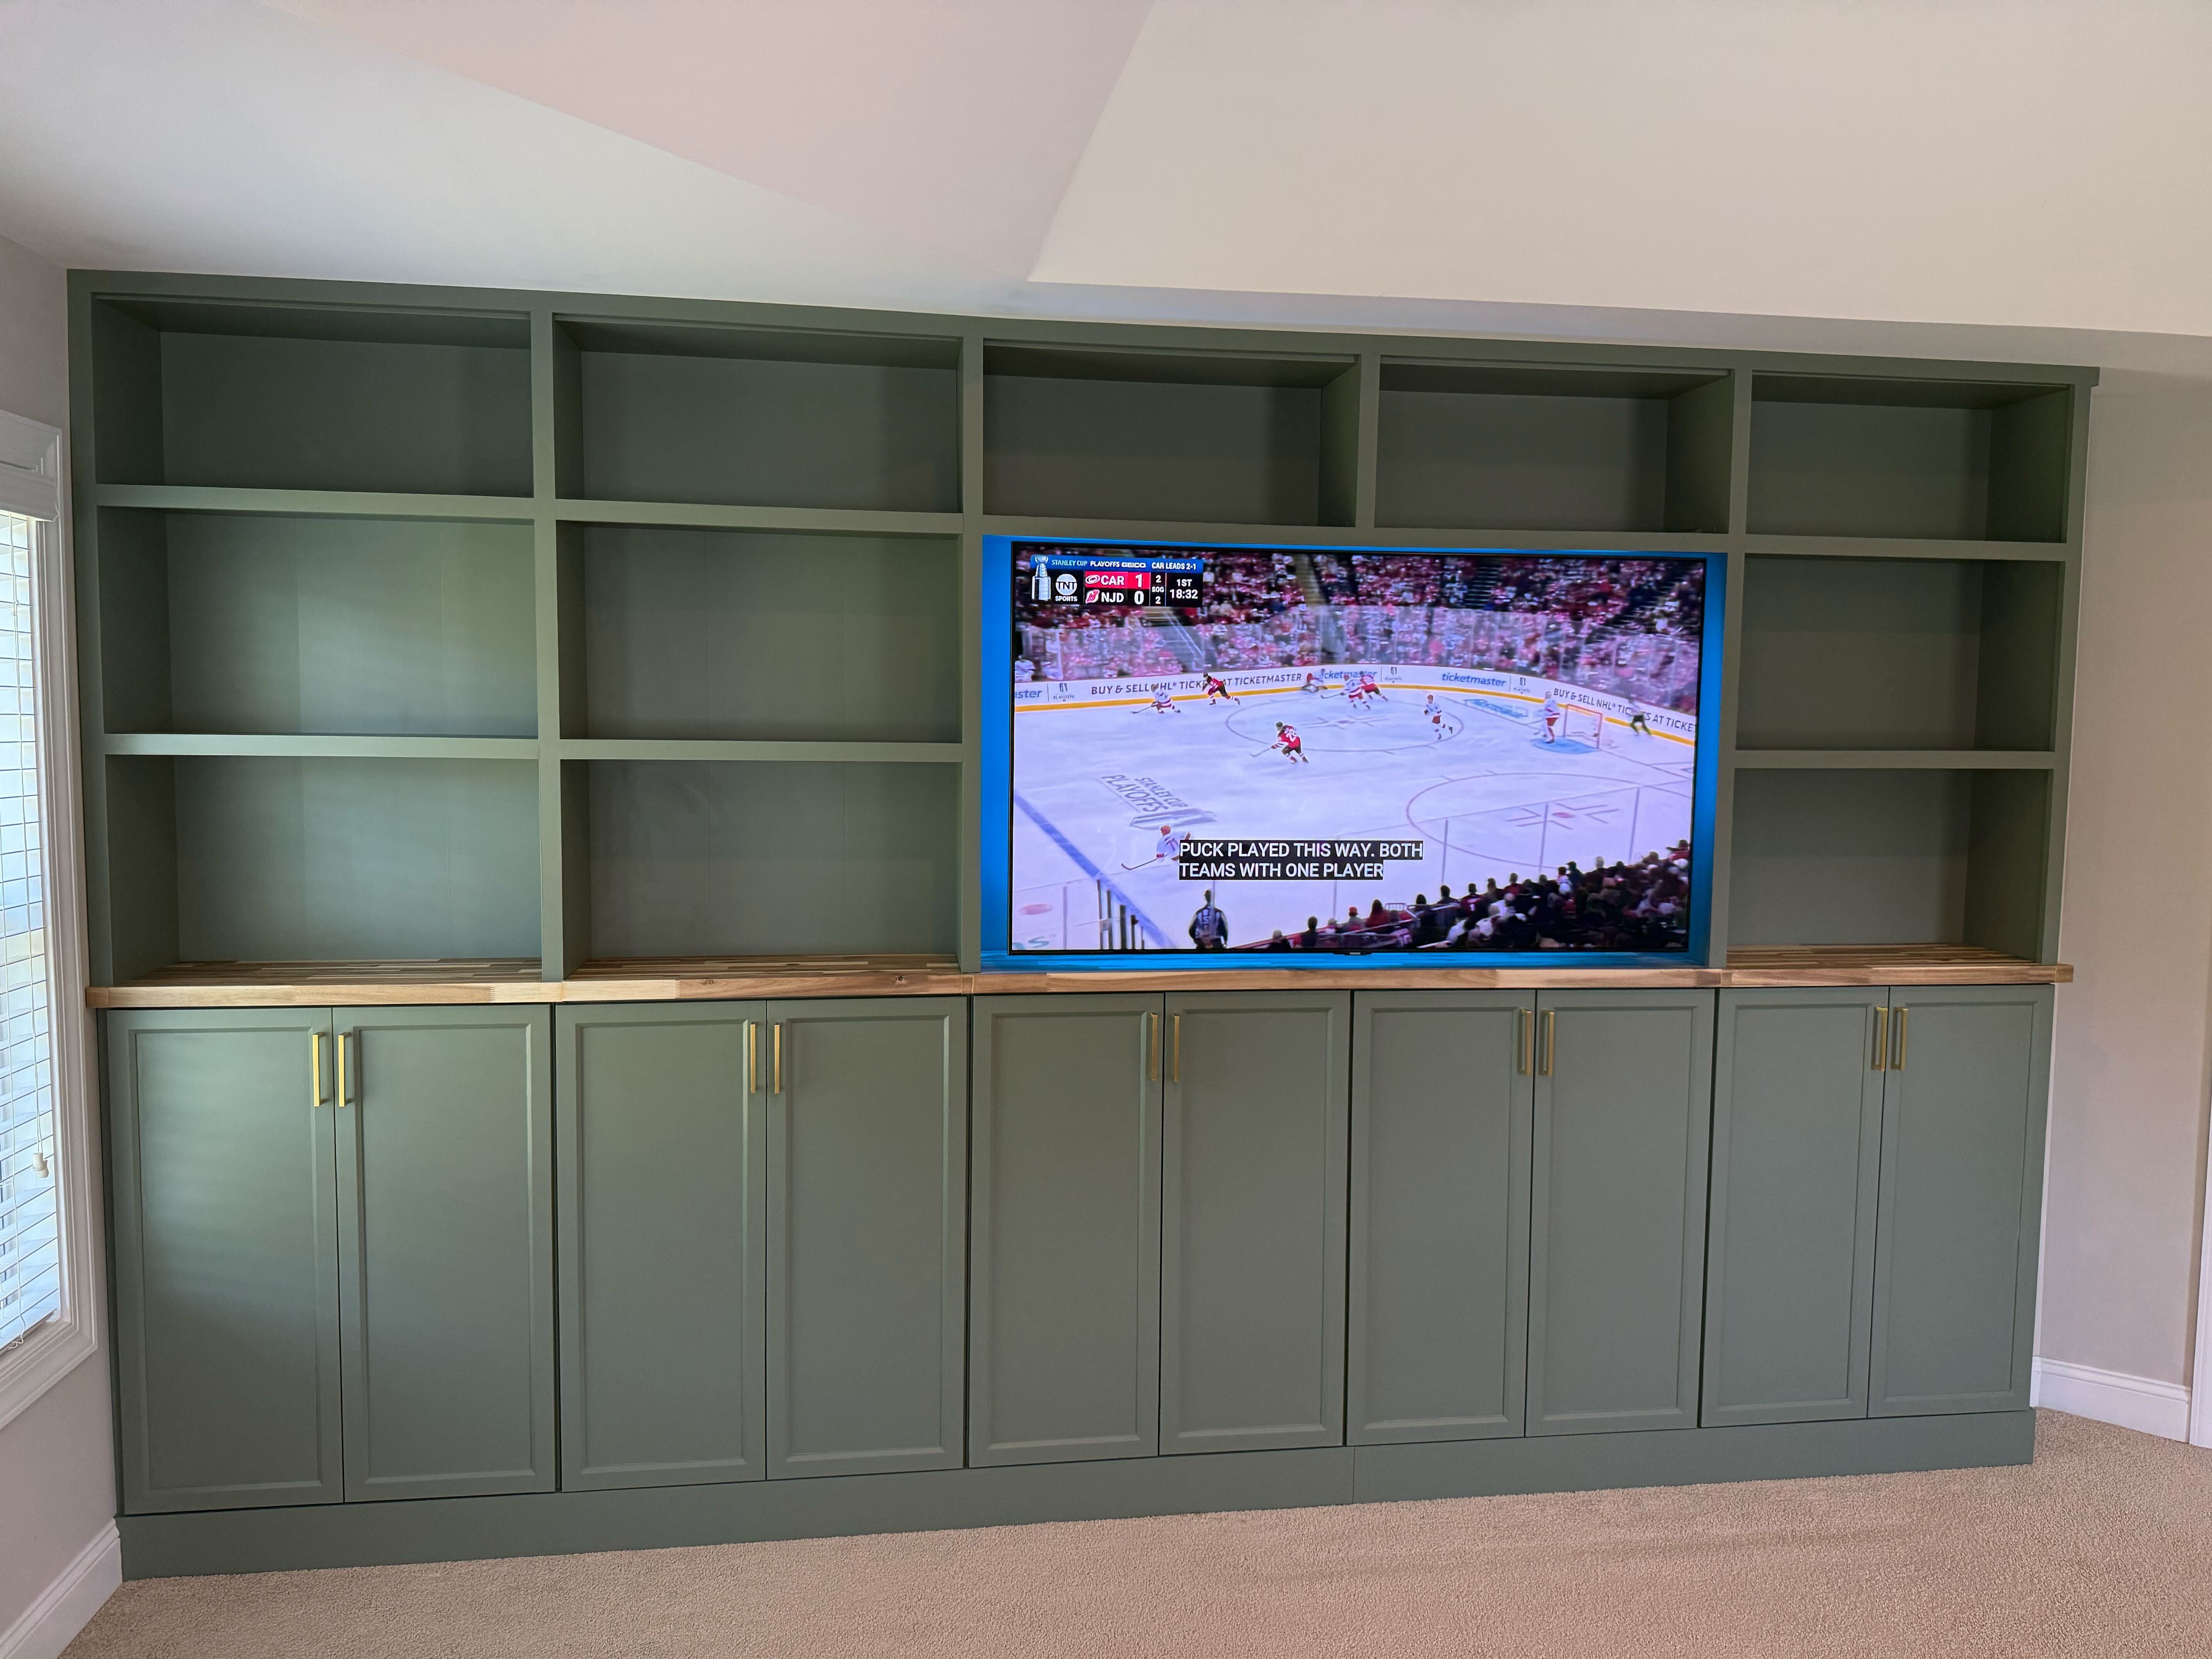
Taryn, if you’re reading this, no, we weren’t using your board as a construction accessory! I was showing Nicole how butcher block might look there. My vision was to cut four pieces of butcher block but to make it look like one continuous piece. It would give the illusion that the bookshelves were just sitting on top of the butcher block:
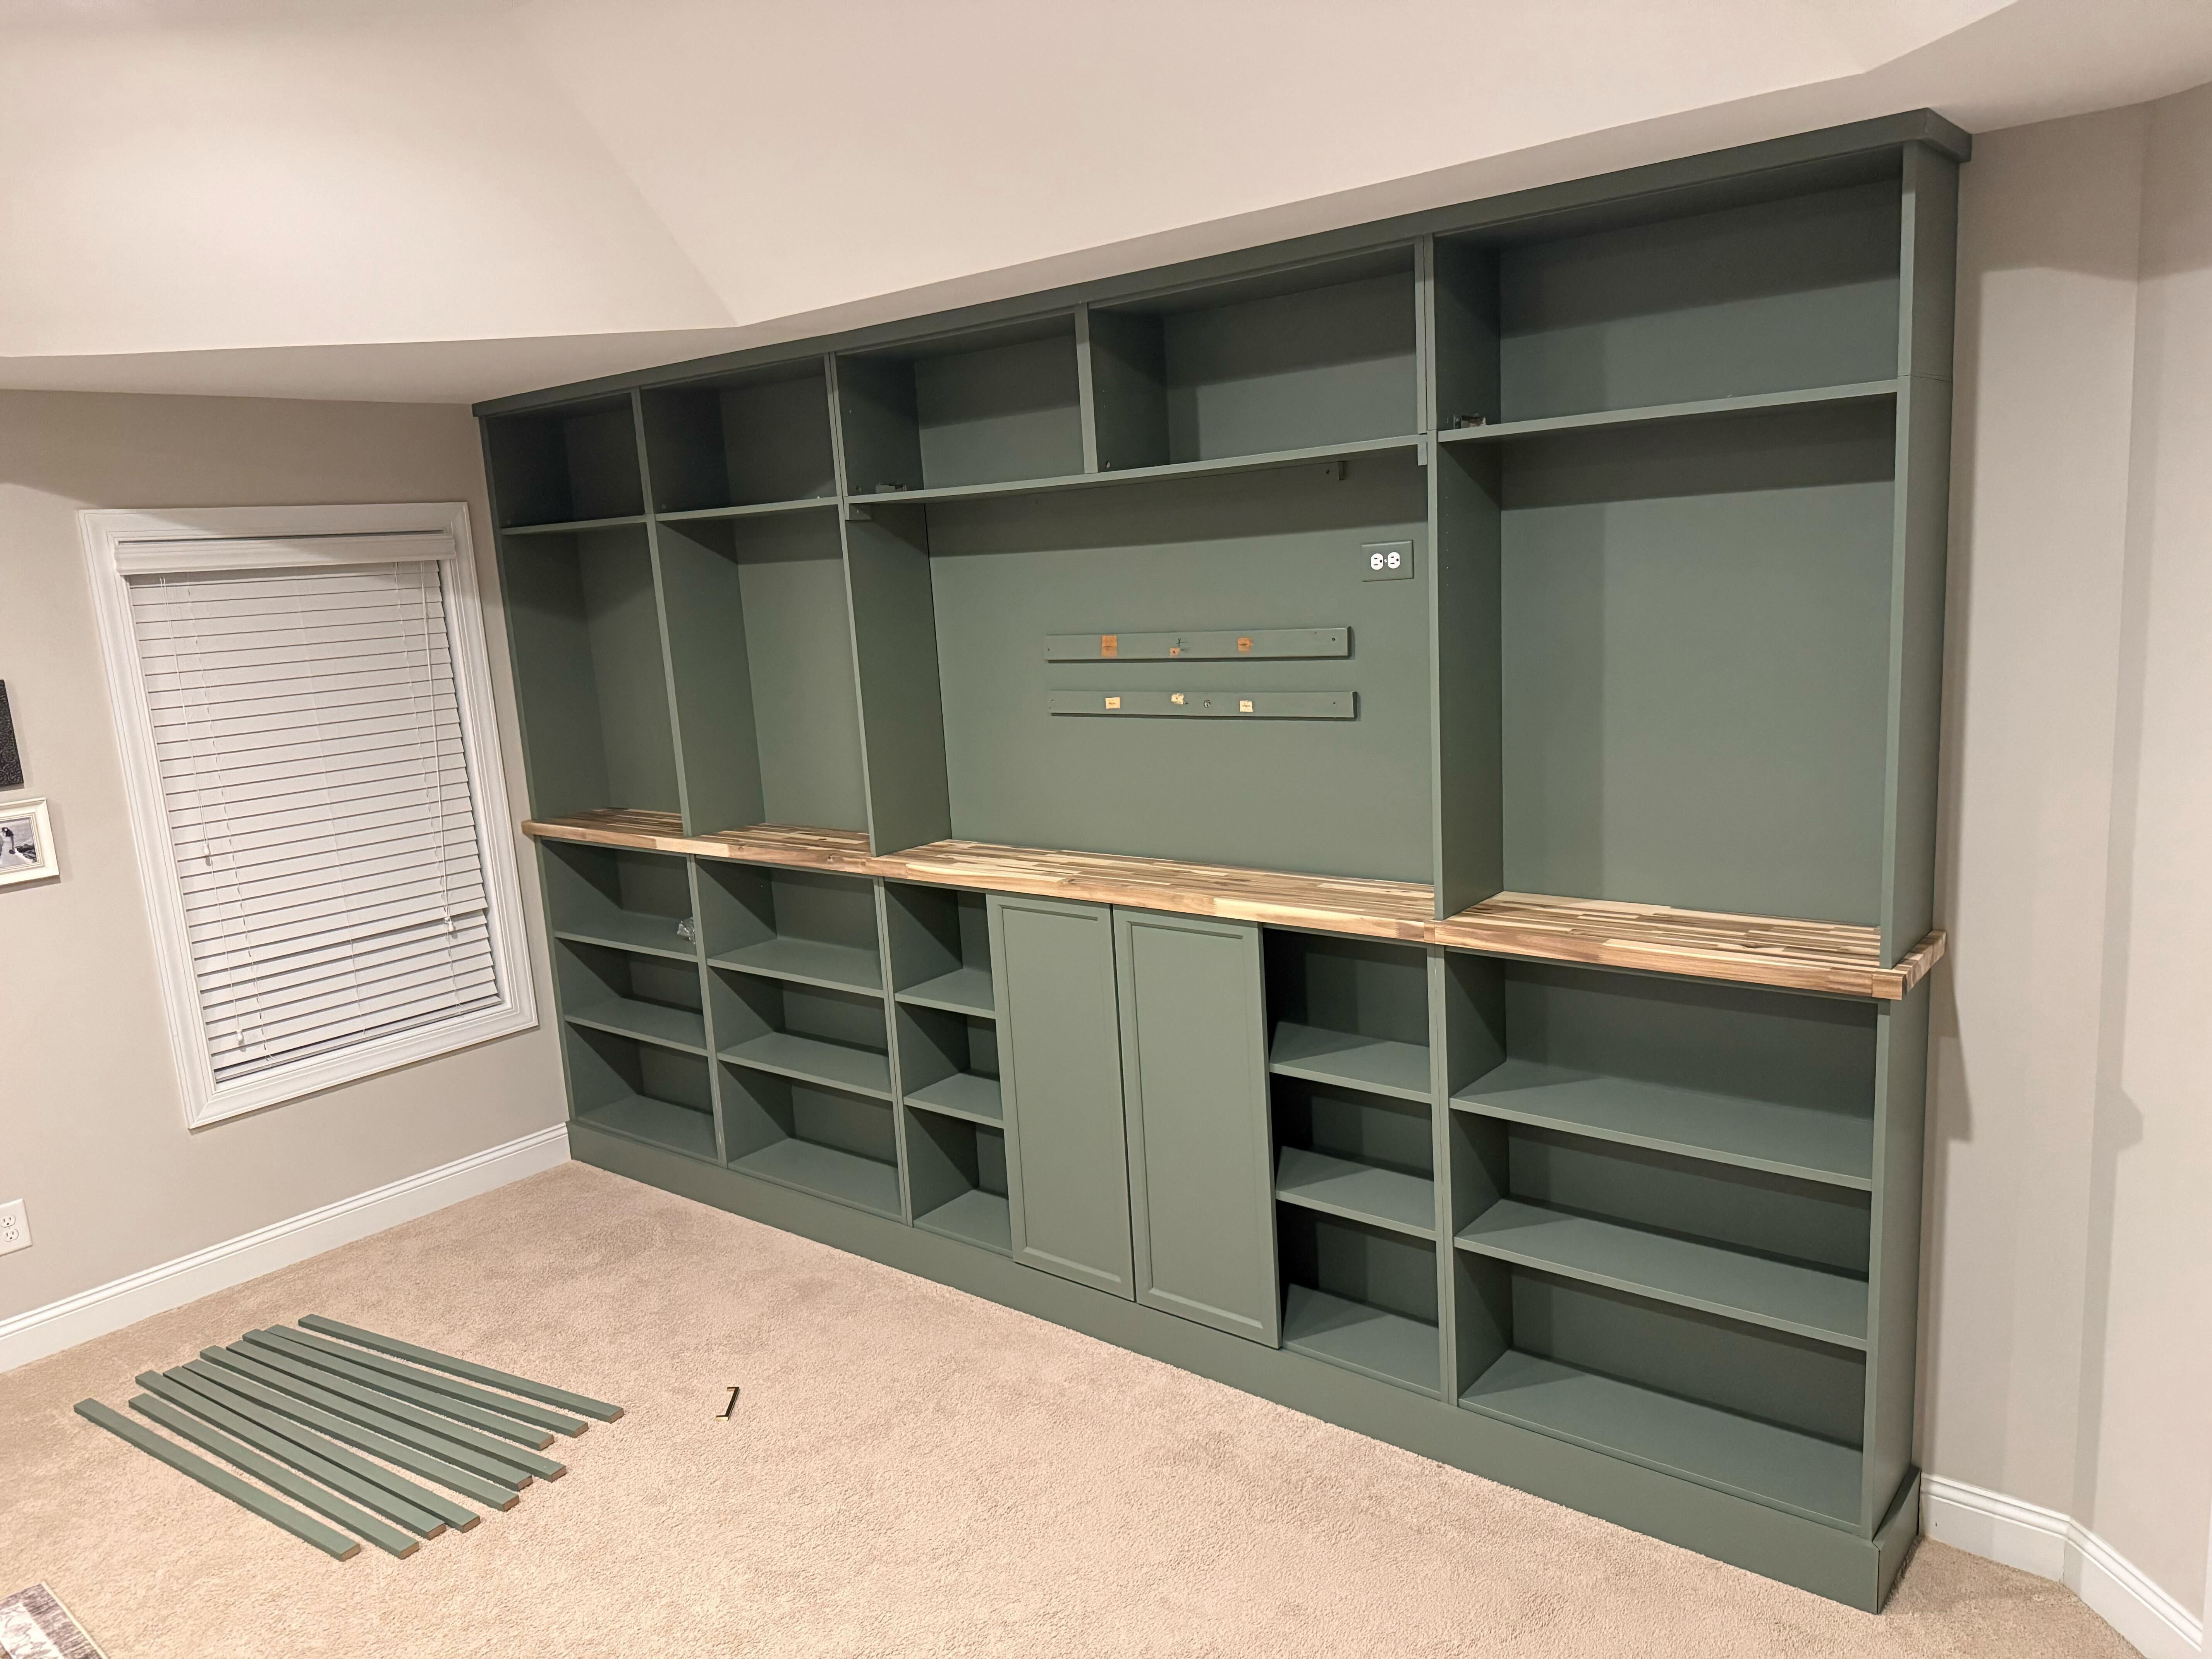
The trickiest part was matching, and I’ll give myself a D here. I didn’t really think about the extra pieces I’d need before I started deciding where to cut the larger pieces to fit, so I ended up with no “other side” to borrow from.
In this picture you can see that the walls of the cabinets, even when pushed together tight, leave an unsightly gap:

Well, two walls of a Billy bookshelf are almost precisely the width of the broad side of a 1×2 (which, contrary to popular belief, is not 2″ wide)… so, we would run 1x2s vertically and horizontally in front of each shelf (and to meet the ceiling), and vertically in the margins. Now, a tricky thing you might not know about the Billy is that the front of the shelf is not flush with the sides (it’s inset by about 1/8″). Making the vertical 1x2s flush with the horizontal ones required something a little crafty to nudge them out. It turns out that an Ace yard stick is exactly the right depth, and was easy to cut to length and hide behind the shelf face. And at $1.49 a yard, much cheaper than (theoretical?) 1/8x2s that I could not find anywhere.
Anyway, here is the finished product. We sourced gold door handles from a local place, put another coat of paint on the flush 1x2s, and then filled, sanded, and painted all those gross shelf holes:
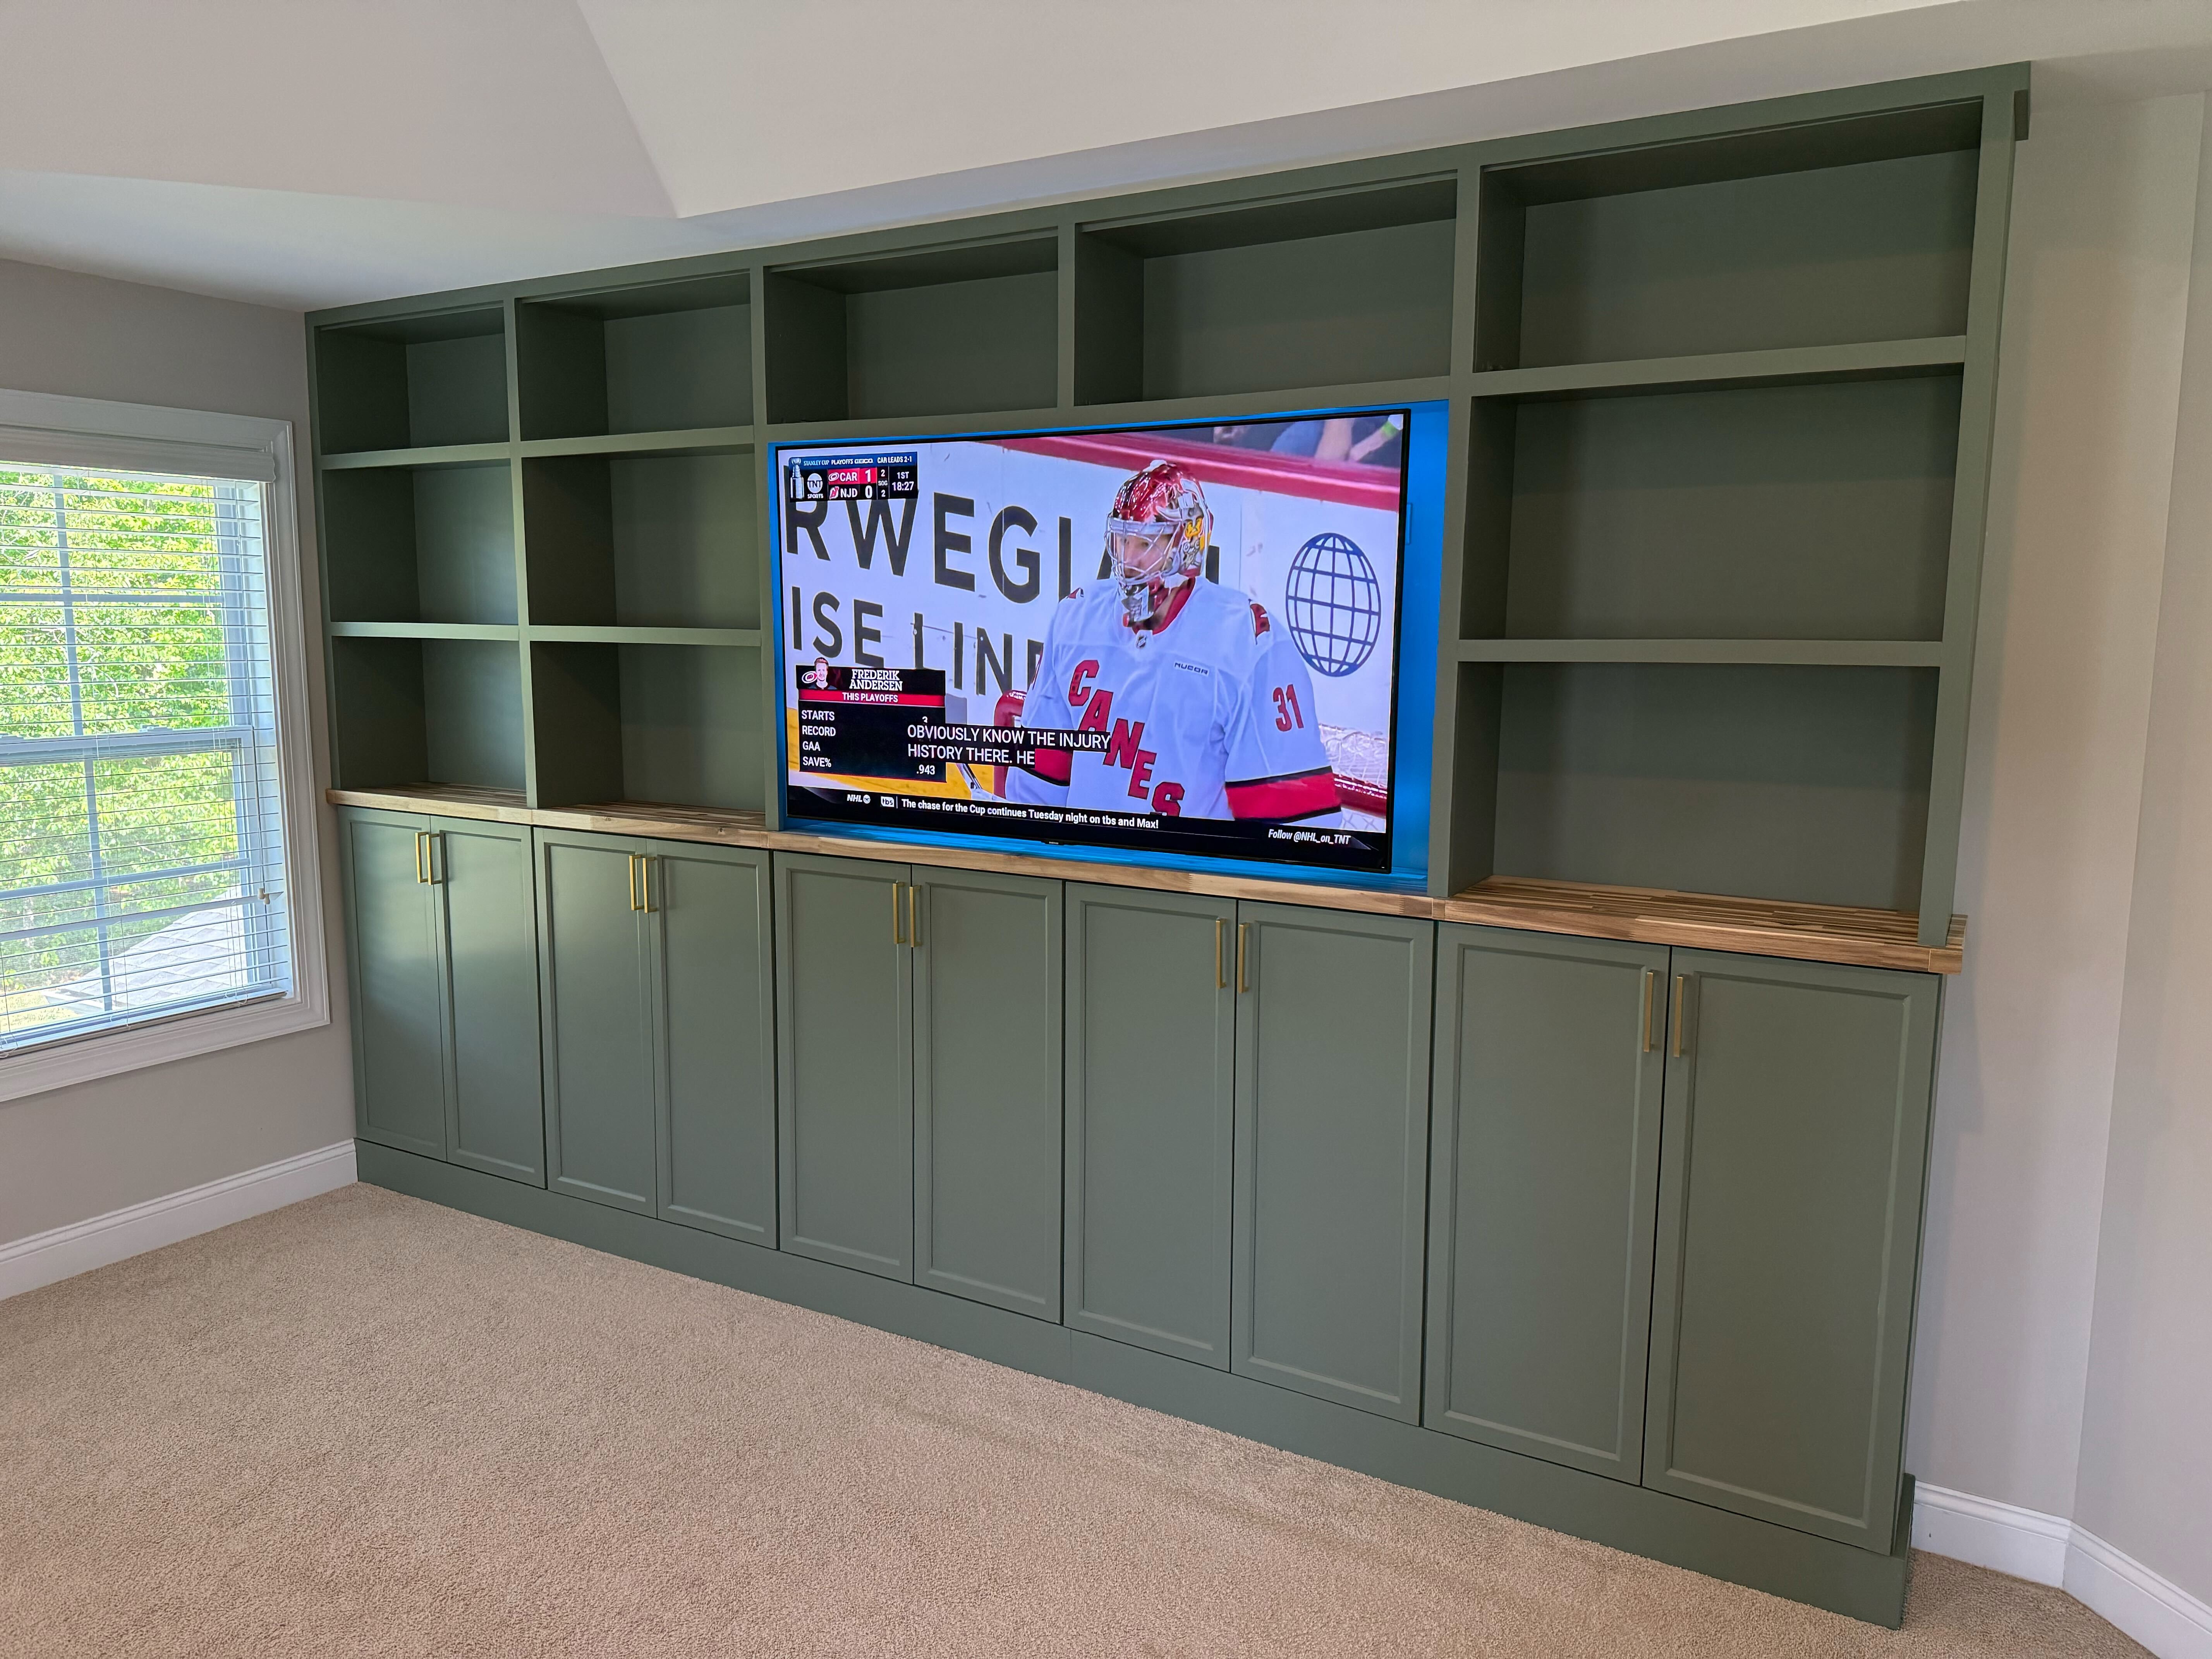
We’re pretty happy with the result! We think it looks like a true built-in. It has some imperfections, of course, but they might only ever be noticeable to us.
Up next? Well, it won’t be a bigger TV, that’s for sure. More garage storage!